Road-warrior… Winter is going!
Frosts are thawing. Creeks are swelling from the first snowmelt. And as the flowers bloom and seasonal affective disorder lifts from the shoulders of RV owners everywhere, the clarity hits-
It’s high time you knew how to dewinterize your RV. There are adventures to be had!
Alas, winterizing your rig was already a cumbersome process. Now, to dewinterize your RV, you have to do the whole damn thing in reverse. The fun never ends!
But what if I told you that RV dewinterizing idn’t have to be such a bore? What if I told you that with a wee bit of guidance, it could be a get-in-get-out mission for a sunny springtime weekend? (Perhaps topped off with a test-run camping trip and some fun beverages! 😉)
Well, it can be… With this COMPLETE Step-By-Step Guide for RV Dewinterization!
Beginner-friendly and advanced-ready, this guide IS your maintenance checklist for getting through the chore without the bore. Everything you need to do is right below; just follow along, step by step.
Because, road-warrior, winter is going. Camping season is coming! We must be ready for the roads ahead.
And so must your valiant steed.

How to Dewinterize Your RV: A Step-by-Step Guide to Getting Back on the Road!
Spring’s knocking, friendo. Adventure time is almost here. Some months ago, you winterized your RV and tucked it in for its slumber through the cold months.
Now, it’s time to wake the beast up from hibernation!
RV dewinterizing isn’t just about turning all the faucets back on and doing a light vacuum. Nay—a full dewinterization is about making sure your RV is in 100% tip-top shape after its long storage.
You want to be road-ready BEFORE you head off on that next great camping adventure. So here is the all-muss no-fuss step-by-step guide to winterizing your RV like a seasoned pro!
Step 1: Check Your RV’s Tire Pressure and Condition
Regardless of whether you have cheap-and-nasty wheels or the best RV tires on the market, your rig’s rollers have been sitting still all winter. That’s not a great look for rubber!
Cold temperatures cause air pressure to drop and rubber to degrade over time. So the first thing to do is give your RV’s tires a good once-over.
Look for cracks, bulges, or any signs of dry rot, especially along the sidewalls of your tires. If anything even looks remotely sketchy, don’t risk it. It’s better to replace a tire than have a high-speed, high-risk highway blowout.
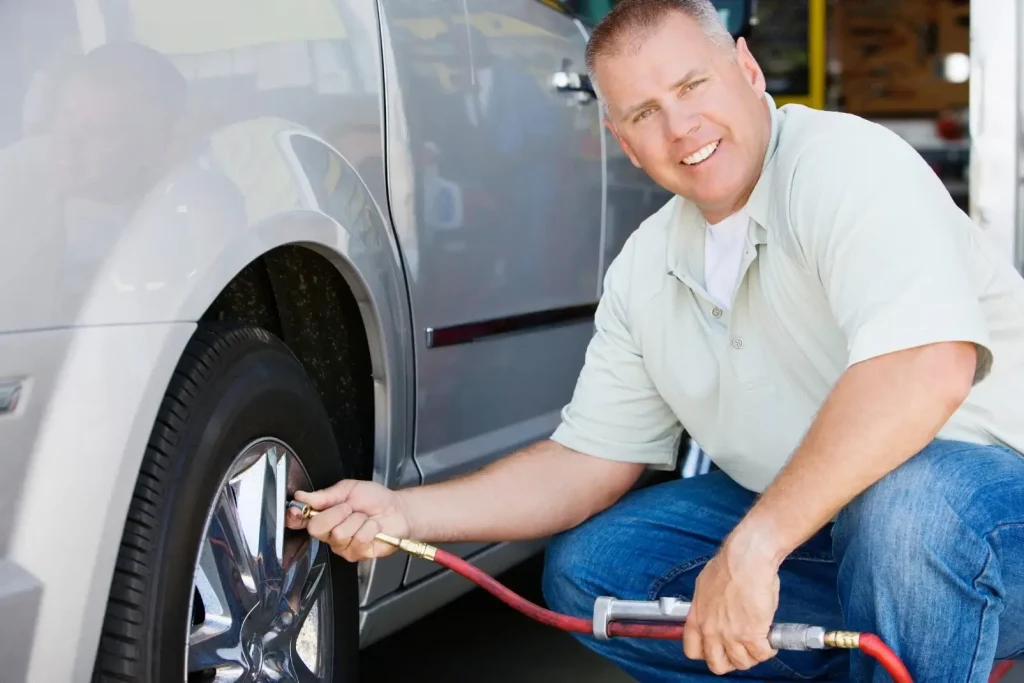
Next, check your tire pressure. You’ll find the recommended PSI (pounds per square inch) on the manufacturer’s sticker, which is typically located near the driver’s seat or inside the doorframe. Alternatively, check the owner’s manual.
If you’re rolling in a fully loaded rig, keep in mind that your RV’s tire pressure may need to be slightly higher than the base recommendation. Ideally, the sticker or manual will list pressure guidelines based on your rig’s weight.
Oh! And don’t forget the spare tire!! It’s easy to overlook, but spare tire maintenance might just save your bacon down the line.
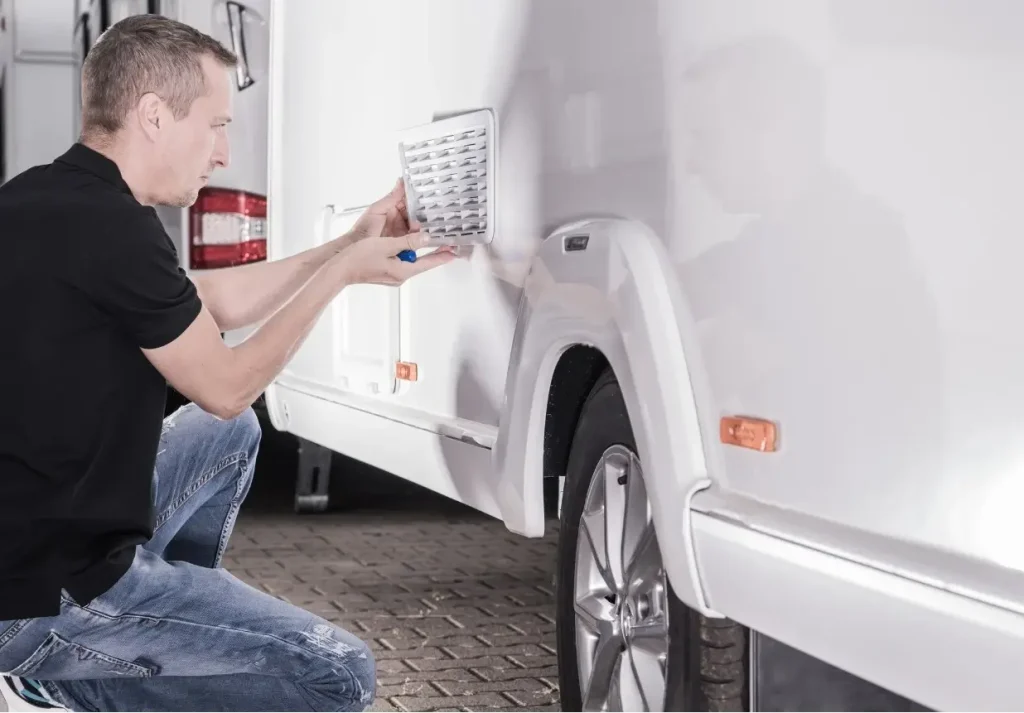
Step 2: Inspect the Exterior for Damages
It doesn’t matter whether you stored your RV inside or outside. Winter is rough on your rig’s exterior. Gradual degradation plus icy temps and frigid winds aren’t an RV’s best friends.
Step two when dewinterizing an RV is to conduct a comprehensive inspection of the outside surfaces and components of your RV. Start at the roof and work your way down. You’re looking for anything like:
- Cracks or dents
- Warping or water damage
- Anything loosened, rusted, or worn down
- Etcetera, etcetera

Even small cracks in caulking or sealant can let water leak into your RV. Water damage is the silent killer, nay, slayer of RVs: don’t mess with it. If you find any exterior damage, get a high-quality RV sealant product and patch it up!
Use your hands as well as your eyeballs! Really get up in your RV’s grillz. The key areas to inspect are:
- The entire exterior surface
- Roof seams and seals
- Window and door seals/channels
- Vents, skylights, and AC units
- Slide-outs and awnings
- Underbelly and wheel wells
- Exterior storage compartments
- Hitch and towing gear
Step 3: Charge and Reinstall Your RV’s Batteries
Batteries HATE sitting idle in the cold. If you removed yours for winter storage, you get a gold star! If they stayed in your RV over winter, however, they’ll still need some love—cold weather drains the charge of RV batteries and can shorten their overall lifespan.
If your RV’s battery has been left in the cold, give the battery a little TLC:
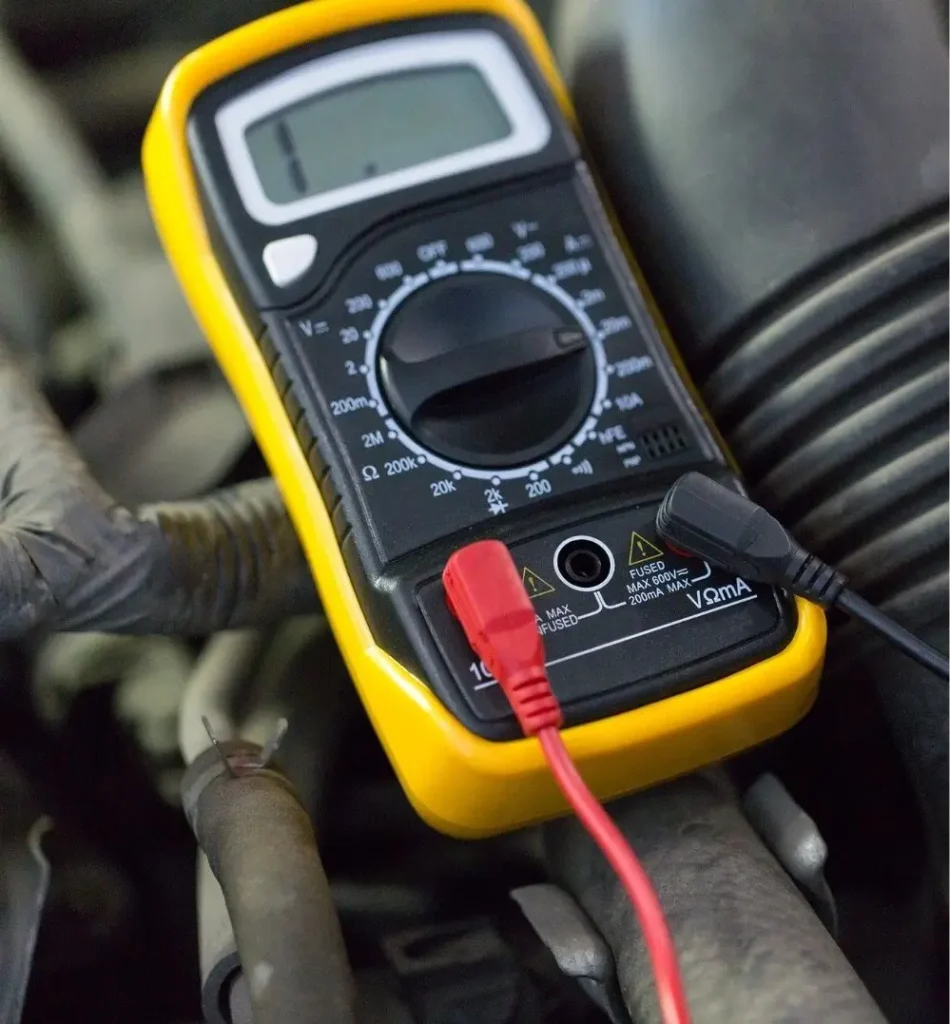
- Check the voltage with a multimeter.
- Charge anything below 12.4V slowly with a smart charger.
- Clean the terminals
- And inspect for battery for any other damage or corrosion.
Honestly, you could probably do a round of maintenance on your battery even if you removed it for the winter. If you’ve bought a top-tier battery for RVing or utilize an RV solar panel system, it’s a poor choice to shorten your gear’s life span with mediocre maintenance.
Afterwards, give the battery a test and a charge. Then after it’s all juiced and spruced up, just reinstall the sucker!
(And don’t forget to check your engine battery too. Nobody wants a flat first day of the road trip.)
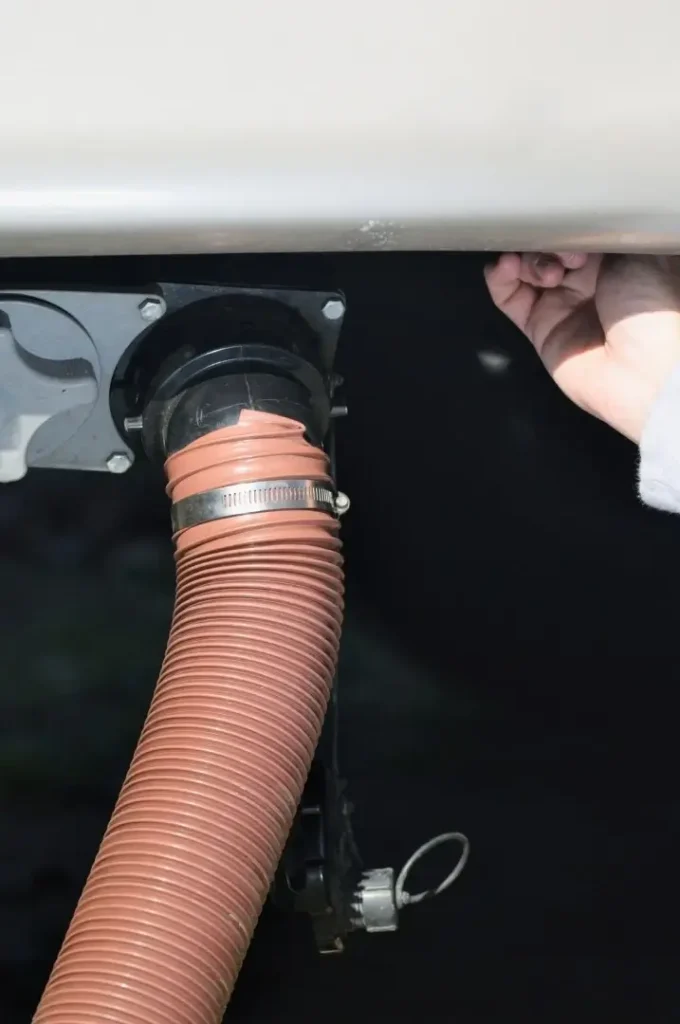
Step 4: Flush Antifreeze from Your RV’s Water System
If you winterized with RV antifreeze (which you most definitely should have), next comes the great flush. While that stuff’s great for your RV’s water system, it’s not something you necessarily want in your morning coffee. Even if you used non-toxic antifreeze, it’ll kill the chocolatey undertones!
First, hook up to a clean water source. Either fill your fresh water tank or connect directly to a city water supply.

Then, open all the faucets in your RV. Every hot and cold faucet. Kitchen, bathroom, shower, that gorgeous new hands-free RV bidet you bought… Even the outside sprayer, if you’ve got one.
Let them run until the water is crystal clear and free of that telltale pink hue. Flush the toilet a few times too. At that point, all the water lines should be clear. We’re not quite done with dewinterizing your RV’s water system, but that’s the first step.
(Important: Don’t touch the water heater tank just yet!! Hopefully, you either bypassed it or left it drained when winterizing. In that case, leave it alone for now—we’ll come back to it in Step 7.)
Step 5: Then, Sanitize the Fresh Water System Thoroughly
Flushing the antifreeze gets the pink stuff out. However, for safe, potable water, we still need to sanitize your RV’s water system. Even with the winter shutdown, bacteria can still sneak into your water tanks, lines, nooks, and crannies.
Start by filling your fresh water holding tank with a sanitizing solution. Typically, you would use about a 1/4 cup of regular household bleach per every 15 gallons of volume your fresh water tank holds. Then run that solution through the RV’s entire water and plumbing system. Once more, turn on all the faucets (both hot and cold), flush the toilet, and run the shower until you smell bleach coming through all the pipes and water lines.
Then, let the solution sit for at least 4–8 hours. Waiting overnight (up to twelve hours) is even better.
After that? Flush the whole water system again! (You may prefer having a convenient city water hook-up for this task.) Refill the fresh water tank with clean water, running it through everything until there’s no more bleach smell. You might need to flush the system a couple of times to completely eliminate residual bleach.

This step’s all about health. Clean and potable water means you won’t be stuck facing any funky smells or marooned-to-the-toilet camp days.
(If they’ve degraded or have gone stagnant, you may also want to swap for new water filter cartridges. You could also consider using distilled water for the final flush, however, most city water connections will suffice.)
Step 6: Check All the Pipes and Holding Tanks for Leaks and Damage
Once everything is clean and flushed, it’s time to give your RV’s plumbing system the once-over. Even with proper winterization practices, freezing temperatures can seep into your motorhome’s structure and split a pipe or loosen a fitting. So you’re looking for any cracks, leaks, bulges, or other wintertime war wounds that need patching.
Start with the RV water pump. First, inspect it for any visual issues. (If you find any, you may need to purchase a new RV water pump or seek out repairs.)
Next, provided it’s all good, turn on the water pump and pressurize the system. Then, just listen.
Sit and listen. Really mindfully: be like Buddha. If you hear any hissing, dripping, or pump cycling when no taps are open, then you’ve (unfortunately) got a leak!
Grab a flashlight and inspect all visible elements of the plumbing system. You should also feel around for damp spots or drips, especially near joints and under sinks. Overall, investigate the following:
- Fresh water lines under sinks and behind access panels
- The hot water heater, tank, and its connections
- The pump alongside the housing for the water filters
- Black and gray tank outlets
- Exterior hose fittings and spray ports
If you do find any leaks or damage in any of the following areas, then you will need to make some repairs before the camping can begin.
Step 7: Reconnect the Hot Water Heater and Reinstall Its Components (Drain Plug, Anode Rod, Etc.)
NOW let’s swing back to your water heater. Provided you have a hot water tank (and aren’t making use of a tankless RV water heating system), we have some extra steps here.
Ideally, you remembered to put your hot water heater in ‘bypass mode’ BEFORE winter storage. If so, you’ll need to reconnect it to the plumbing loop and reinstall any components you removed for storage.
Start by replacing the drain plug or anode rod. (Some water heaters use one or the other, and some use both a drain plug and anode rod in tandem.) Hand-tighten these first, then secure them with a wrench—just don’t overtighten or you risk cracking the threads!

Next, close the pressure relief valve. Then, return any bypass valves to ‘normal flow’ so water can re-enter the tank.
Once connected, open a hot water faucet and turn on the water pump (or use a city supply connection). Wait until water flows freely. Then, and ONLY then, can you power the water heater. NEVER run the water heater empty—that’s a fast way to fry the heating element.
(Note: If you forgot to put your water heater in bypass mode before winterizing, that’s ok. That just means you have to flush and sanitize it as well, which, admittedly, is a massive pain in the posterior.)
Step 8: Check, Refill, or Replace Your RV’s Propane Tanks
Propane is one of the best fuels for storage. That said, after a long winter chill, it’s still wise to inspect your propane system and tanks.
Specifically, look for any rust, dents, or damage around the valves. Check the OPD valve (the triangle-shaped knob) and rubber hose connections for cracks or wear. If you spot or smell anything even mildly sketchy, don’t take chances—replace it immediately!

After, if you had previously removed the propane tanks, reinstall them. Ensure everything is snug and strapped in. And if your levels are low, you can give them a refill. It’s better than running out of gas mid-cook-off!
(Pro-Tip: A full propane tank reads lower in freezing temps. Don’t panic if your gauge looks off or you get a funny reading until the tank warms up.)
Step 9: Confirm All Propane Appliances are Functioning Normally
Now, you want to conduct a routine test of any and all appliances hooked up to your RV’s propane system. Light up each propane appliance carefully, one at a time. This means stove burners, the heating system (including any propane-based space heaters in use in your RV), the fridge (if it runs on propane)—all of it!
You’re checking for proper ignition and a consistent flame. It might take a few seconds for propane to move through the lines, but that’s totally normal.
Once you’re fully up and running, you should also sniff around the entire propane system for leaks. If you catch the faintest whiff of rotten eggs (and sulphurous farts), shut everything down and check your connections with a leak detector or soapy water.
Otherwise, if everything lights smoothly and the flames burn clean and blue, you’re good to go! If not, try a good cleaning before you make any service calls to a technician.
Step 10: Test All On-Board 120-Volt Appliances
Tested your propane? Next, you’ve gotta test your RV’s electrical system!
With either an RV generator or shore power connected, start testing all your 120-volt appliances. (These are the appliances that use standard household outlets rather than batteries or 12V connections.) You’ll want to test the appliances (e.g., microwaves or fridges) as well as all of your RV’s 120-volt outlets. Just flip everything on, one at a time, and confirm functionality.

Keep an eye out for signs of power surges, strange noises, or tripped breakers. If something doesn’t respond, check the GFCI outlets and your RV’s breaker panel before assuming it’s dead.
Finally, you should absolutely 100% test your RV’s surge protector or EMS device as well. This is pretty straightforward:
- Do a visual inspection. Look for rust, damage, or corrosion.
- Check the indicator lights to ensure you’re getting all the correct signals.
- Use an outlet to confirm that the device is passing power.
- And check the digital display (if applicable) for voltage readouts and any error codes.
- Lastly, perform a full load test with a multimeter. (This is optional.)
Ultimately, if you’re protectors are protecting and your microwaves are microwaving, you’re good to go!
Step 11: Test Your RV’s Generator
Next up for electronics, it’s time to test your RV’s portable generator or power station. Portable power stations are pretty simple: you just need to check and test the battery health, cable integrity, and charging function.
However, a generator (diesel, propane, gas, etc.) requires a bit more care. Start by inspecting the exterior for dirt, nests, or chewed wiring. Critters love cozy compartments… You might be surprised to find what was hibernating in there over the winter alongside your RV.
If the integrity of the unit is good, check the oil next and then fire it up! Let it run under a high load (e.g., an air conditioner) so it gets a proper workout. A big bout of operations is also good for burning off any excess moisture or carbon buildup after a long spell in storage.

If the generator sputters, surges, or won’t start, you can try changing the oil, oil filter, or spark plug. Old fuel is another common culprit, so you can also try draining and refueling the generator.
Once everything is running smoothly, ensure you turn the generator over and use it monthly going forward. Or at least until camping season is in full swing. An idle generator is a dying generator.
Step 12: Inspect Your RV’s Engine and Top Off All Fluids
The next few steps of dewinterizing your RV are all about the mechanics. However, in regard to different types and classes of RVs, this step is exclusively for those with an engine. (I.e, motorhomes… i.e., Class As, Bs, and Cs… i.e., no trailers.)
RVers with a motorhome engine: give the unit a good dose of TLC after a long winter’s sleep! Start with a visual inspection under the hood. Look for cracked belts, leaks, signs of corrosion, or chewed wires (critters love RV engine bays just as much as generators). Check that your battery terminals are clean and connections are solid too.
After an inspection, turn the key and listen—rough idling, warning lights, or hard starts are all red flags to investigate. However, if the engine runs well, let it idle for a light workout, much like your generator.

Lastly, ensure you also top off all your fluid levels. Fluids degrade over time, even in storage, so a top-up is a must. Make sure you check the:
- Engine oil
- Coolant
- Brake fluid
- Transmission fluid
- Windshield washer fluid
- Power steering fluid
Step 13: Change All Engine, Air, and Water Filters in Your RV
Next comes filters. And this includes the filters for both the RV’s interior as well as the mechanics.
Honestly, I wouldn’t even bother cleaning your filters. After months of sitting, filters can easily collect a lot of dust, moisture, or even mold. Anytime you dewinterize your RV, I’d say it’s time for a full annual replacement.

These are the filters to replace before that first camping trip:
- Engine air filter
- Cabin air filter (for motorhomes)
- Fuel filter
- Water system filter
- A/C intake and return filters
- Furnace filter
Step 14: Inspect Windows, Seals, and Air Vents
If you’ve ever actually lived in your RV over winter, you know how important seals are. One tiny crack or failed seal and suddenly you’ve got a drafty, leaky, gloomy home.
Walk around your rig and check every window and roof vent. Open and close them—you want to make sure everything seals tightly.

You should also look for cracked caulking, brittle rubber seals, or signs of moisture between window panes. On roof vents and fans, check for any damage to the covers or mesh screens—those damn critters do love to nibble our rides!
Overall, you’re looking for any damage in the vein of:
- Cracked or dried-out window seals
- Condensation inside double-pane windows
- Loose or rattling vent covers
- Warped skylights or fan domes
- Signs of leaks around corners or seams
And if you spot trouble, reseal the culprit with RV-safe caulk or just replace the seal entirely. You will have a much more enjoyable camping season in a well-sealed home rather than a leaky boat.
Step 15: Test All Safety Devices
Safety first, motor-homies! Before you hit the road, give all of your safety gear a proper test. This stuff could literally save your life.
Test every smoke detector, carbon monoxide detector, and LP detector (for propane leaks). Replace their batteries too. Use those test buttons—if a single safety device doesn’t seem like it’s behaving, swap it out immediately.

Don’t forget any systems either. If you use a tire pressure monitoring system or even an RV temperature monitor for pet safety, test those as well!
Fire extinguisher? Make sure it’s fully charged and easily accessible. If it’s over five years old or the gauge is in the red, replace it—no exceptions.
Emergency exits? Yup! Test them too. They need to be easily openable and not jammed by any recent caulking jobs.
Put short, don’t skimp on testing your safety devices when dewinterizing your RV. A five-minute check now beats dealing with literally any of the consequences down the line.
Step 16: Restock First Aid and Emergency Supplies
Alongside safety devices, emergency supplies must be fully stocked before hitting the road! This means your first aid kit and emergency roadside kit.
With your first aid kit, check any and all expiration dates (e.g., for medication) as well as restocking general supplies like bandages. Make sure your kit meets your travel style too. (For example, include a snake bite kit if you intend to do more backcountry hiking this season.)

Meanwhile, for the roadside emergency kit, it’s unlikely anything will have expired. However, do a quick test to ensure all the safety gear is still functional (e.g., with your flares, jumper cables, torches, etc.).
If you have any other safety gear not in the kit (such as a tire jack), make sure you inspect those too. Basically, these emergency supplies are essential must-haves for RV life, so don’t skimp on them!
Step 17: Update Your Registration and Insurance
Next comes admin—woohoo!
Paperwork might not be as exciting as iconic cross-country expeditions. But really, there can be no iconic cross-country expeditions without a bit of paperwork!
Start with the fundamentals. Before you hit the road, double-check that your vehicle registration and driver’s license are up to date and valid for the incoming season.

Next comes your RV insurance coverage. Review it to ensure that it’s both current and aligned with your rig and travel plans. If you’ve upgraded gear or changed how you RV, your policy needs to reflect that!
Finally, don’t forget the extras! If your RV has roadside assistance or even a comprehensive extended warranty or service plan, do your admin there too! Just make sure your policies and paperwork all reflect your current needs.
Step 18: Conduct One Last, Road-Ready Maintenance Walkthrough
Wrapping up! Before you rev up and roll out, take a final lap around your rig. Think of it as your RV’s preseason warm-up—it’s one last shot to catch anything you might’ve missed.

Some key areas to investigate for this include:
- One more inspection of all the roof seams, window seals, and exterior caulking.
- A solid lubing of all your RV’s slide-outs, hinges, jacks, and stabilizers.
- Double-check (including on a test drive) your brakes, tires, and suspension.
- If you disconnected any of it for storage, reconnect your fuses and wiring.
- Finally, fire up your 12V systems!
This last step isn’t a huge task. (Although, optionally, if your RV is looking rundown, you might want to consider painting the exterior too.)
Either way, just consider this the last round of spot checks to get your RV ready for camping season.
6 Spring Cleaning Tips for RV Camping Season!

Finally, although not strictly a key part of how to dewinterize an RV, I recommend getting stuck into spring cleaning. For the slickest adventures possible, doing a big spring clean of your RV is a must.
While spring cleaning is a whole other rabbit hole, here are the main tasks to do:
- Wash the Exterior: Your rig’s likely wearing a nice layer of dust, pollen, or leftover grime from its sleep in storage. Give it a good scrub with RV-safe soap, and don’t forget the roof either.
- Check for Critters: Mice, wasps, spiders, and even possums love quiet, cozy RVs. Look in all the storage bays, vents, and around the engine for nests or signs of chewing. (Especially if you skipped pest deterrents over winter.)
- Clean Fans and Air Conditioners: Changing filters is a good first step, but dust builds up fast in and all over ACs and fan blades. Remove the covers, give everything a vacuum or rinse, and then double-check airflow isn’t blocked.
- Wash Windows and Screens: Grimy windows kill a good view on a scenic drive. And dirty screens kill your fresh air circulation! Instead, use gentle cleaners and give the screens a healthy rinse.
- Change Linens and Towels: Linens very quickly pick up musty odors and dampness in storage. Either swap them or at least do a nice big wash of all your linens and towels on a hot setting.
- Vacuum: After a long storage, you’ll probably find that dust, dead bugs, and winter debris have built up in your RV. A quick vacuum clears that mess out and makes the space feel instantly fresh again.
And That’s How You Do RV Dewinterizing Right!
The dewinterization’s done. The cleanup’s done. Even the admin is sorted!
Though the above is a very comprehensive list, it’s exactly how to dewinterize your RV with great success. Honestly, even if you’ve spent the winter living in your RV, I’d still say you need to run through most of this checklist before the nimbler and more nomadic summer months arrive. (Maybe just with some tweaks, e.g., don’t forget to de-install your RV’s winter skirting solution before you move out.)
So save this guide! Bookmark it and come back anytime. Feel free to print it off. Just make sure you use it.
Dewinterizing your RV is critical before any adventures can begin in earnest. It’s about safety; it’s about the longevity of your rig.
Just like any other warrior’s steed, a road warrior’s ride deserves respect and TLC. The more you give, the more you’ll get in return!
Winter is going, and maintenance season is here. So put on some dope tunes, crack a few coldies, and give yourself a productively chill weekend to get the chores done. Because maintenance season means one thing-
Adventure season is right around the corner.

25055394423