

En garde, winter warriors! The cold months are approaching… It’s time to either store your rig or get ready to RV through the winter!
Sleeps get crispier. Park-ups get frostier. Water systems get frozen (if you’re not careful).
Winter RV living is no joke, and that’s why you MUST prepare for the trials ahead!
I have endured some truly shocking winters in an RV. Sometimes, I’ve even enjoyed some truly shocking winters in my ol’ motorhome.
But at other times, I’ve barely made it through in a beat-up uninsulated tin can! Trial and error is the path to mastery: I’ve done spades of both while freezing my butt off!
And at the end of it, I put all those lessons from a seasoned seasonal traveler into one ULTIMATE guide to winter camping in an RV. The gear… The safety considerations…
And all the essential tips on how to survive moving through those frigid climates!
Living in an RV in winter is about preparation. So, prepare for the coming dark with this frostproof survivor’s guide. But as all experienced nomads know…
The biggest struggles bring the greatest rewards.

What is Winter RV Living Really Like?
Well, it’s cold! But it’s not too cold, if you’re prepared for it. 😉
Living in an RV through winter has a different rhythm to the typical sunny-season experience. Mornings arrive with frost on the windows and a chilling bite in the air. Boots get wet, condensation appears in unfavourable places, and suddenly urinating into a jar at midnight becomes a preferred alternative to leaving the warm duvet.
But conversely, there’s plenty of magic to be discovered by remaining active in winter. Snowy park-ups are, in one word, sublime. The interior of a warm RV feels impossibly cozy when the world outside is frozen solid. And winter tends to deliver some spectacular locales without the summer crowds attached.
The trick is keeping winter outside where it belongs.

It doesn’t matter what class of RV you’re driving — a properly prepared rig can remain warm, dry, powered, and fully functional while camping through some surprisingly nasty weather. An unprepared one? Well… that can result in frozen pipes, flat batteries, damp bedding, and some truly character-building mornings.
So before we start fortifying your little cabin on wheels, there’s one important question to answer…
How Ready is Your Rig for Winter Camping?
So the myth of winter RVing — suffering and shivering in an unprepared camper — is far from true. But all the same, not all RVs enter winter on equal footing.
Some rigs are practically summer cottages with wheels. Other cold-weather campers are purpose-built to shrug off freezing temperatures. So before buying another heater or wrapping everything you own in insulation, I advise taking stock of what your RV is already working with.
Four-season RVs give you the biggest head start. There’s no universal standard behind the term, so the exact package varies between manufacturers. But generally, you’re looking for winter camping features designed to protect both the living space and the vulnerable systems underneath it.
That means paying attention to things like:
- Insulation: Particularly the roof, walls, floor, and underbelly.
- Windows and seals: Double- or thermal-pane windows and well-sealed doors reduce heat loss considerably.
- Plumbing protection: Enclosed or heated tanks, protected water lines, and a heated underbelly are major wins below freezing.
- Heating: A capable furnace needs enough grunt to comfortably heat the entire interior.
- Power: Extreme temperatures put additional strain on batteries, while heating and other winter equipment increase your energy demands.
- Ventilation: A warm RV still needs to breathe. Otherwise, all that cozy interior air starts depositing moisture everywhere.
Something like the Arctic Fox series from Northwood, with models of travel trailers, fifth wheels, and is even rated as one of our top picks of truck campers, is a terrific example of the philosophy. These rigs are designed with cold-weather camping in mind rather than requiring you to retrofit every layer of winter protection yourself.

Nevertheless, you absolutely DON’T need a dedicated four-season RV to camp in winter.
I’ve made it through plenty of cold temps with careful planning, a little gusto, and no $100k Arctic Fox in sight! Window insulation, draft protection, skirting, and the right heating setup can dramatically improve a less winter-ready rig with a little extra work.
Ultimately, winter readiness comes down to a pretty simple equation: keep the heat in, keep the water flowing, keep the moisture under control, and keep the power on.
So let’s start with the first part.
The Essential Gear for Surviving Winter RVing
Ok, real quick! Throughout this article, there are oodles of good tips and info on how to make winter living a blast. But also, I’ve recommended a few key products throughout tailored to the exact conditions you can expect.
Before we get on with the juicy deetz, here’s a quick snapshot of the six pieces of essential winter gear I advise investing in to keep the icicles out of your nostrils and back outside your RV where they belong.
| Image | Product | Features | Interested? |
Easy Insulated Skirting  | A no-nonsense inflatable RV skirting solution for winter camping on the go. | ||
Cheap Window Insulation  | Don’t have double-pane windows? Try this affordable DIY option instead. | ||
Indispensable Winter Gear  | Camco does it again with a top-notch heated water hose for freezing conditions. | ||
Top Plumbing Insulation  | Premium self-regulating insulation for RV pipes and water systems. | ||
Efficient Electric Heating  | A small and efficient heating option — great for small spaces or with other heating units. | ||
Compact Dehumidification  | For curtailing winter condensation, a small and simple dehumidifier is the way to go. |
Insulation: How to Maintain the Interior’s Warmth
First up comes structural insulation. In this regard, dressing your motorhome for winter weather is no different from dressing yourself: layers are your friend, and tight seals with no exposed flesh are the way to go!

Heating your RV is only half the battle. Without adequate insulation, all that precious warmth simply escapes through the walls, windows, floors, doors, and every sneaky little draft in between. Your heater works harder, your fuel or electricity disappears faster, and the cold air keeps finding its way back in all the same.
That’s why insulation is the first line of defense for winter RV living. Before worrying about producing more heat, you want to get better at keeping the heat you already have.
By safeguarding these weak points, you’re essentially building a warm and cozy shield around your RV against the harshest of winter weather. Starting with the bottom up!
RV Skirting
Protect yo’ booty! Equipping your RV with skirting is like adding a blanket around its base. Or maybe a big, warm, and puffy skirt.
RV skirts help protect the vulnerable components underneath your rig from freezing and reduce heat loss through its base. They’re essential for blocking wind and trapping relatively warmer air around vulnerable underbelly components.
There are two broad routes to choose from when selecting an RV’s winter skirting: inflatable solutions or more traditional attached skirting.
- An inflatable skirt is by far the easiest to set up and pack down. Wrap it around the base, blow it up, and you’re all set!
- Meanwhile, attached or rigid skirting (e.g., vinyl, fabric, rigid foam-board, or DIY materials like plywood or corrugated plastic) offer a more permanent solution and can provide excellent insulation. Depending on the material, these are secured with fasteners or adhesive, fitted into mounting systems, or simply cut and positioned around the RV’s perimeter. But as such, they require more time to set up whenever you arrive in a new spot.
The latter is obviously a lot more hassle, but a well-insulated permanent or semi-permanent setup can offer excellent protection in seriously cold conditions too. It really comes down to your preferences between the two categories. Inflatable for convenience when moving; installed for a more traditional long-stay full-season setup.

—Want the easy option? AirSkirts are my pick for RVers who actually move around during winter. There’s no drilling, snaps, or hauling around sheets of foam board. All you have to do is position the inflatable tubes around your rig, inflate them, and pack them away when it’s time to move on.
Windows and Insulation
Your RV’s windows are one of the main culprits for heat loss in a camper. Proper window insulation prevents cold drafts and holds heat inside your RV. It makes your motorhome and living space that much more motor-homey!
Before anything, start by checking for drafts around the window frames. Worn weatherstripping and deteriorated seals should be replaced or resealed before you start piling on insulation. You want to stop cold air sneaking around the window before worrying about the heat escaping through it.
Then comes the insulation! Double-pane windows serve as a high-end winter RVing solution. They trap air between two glass layers, forming a protective barrier against the outside environs. Some modern RVs already come with these equipped, or you can instead make the upgrade. Much like double-pane home windows, they’re expensive, but they’re also a damn good investment.

Reflective insulation sheets, however, are a cheaper alternative option. They don’t have the same robust protection as double-pane windows… But they are a lot kinder to your wallet!
It’s a simple process too. Just buy some reflective window insulation sheets, cut them to the exact size of your windows, and secure them with Velcro or tape. They’ll add another insulating barrier over the glass and reflect radiant heat back inside, helping to maintain the RV’s interior warmth.
Lastly, get yourself some bomb-ass curtains! Thermal curtains are a simple yet surprisingly effective way to keep heat from escaping through your RV’s windows. These heavy-duty, insulated curtains create a barrier that blocks cold drafts and holds in the warmth.
Hang them over all your windows to snatch back a few degrees from Jack Frost. Many even come with Velcro or magnetic strips for easy installation, with the added bonus of even snoozier lie-ins on wintry morns.
Doors, Floors, and Other Heat Loss Points
Windows might be the obvious offenders, but they’re not the only places where precious heat sneaks out of your RV. The goal is to create as complete a thermal envelope as possible. Every poorly insulated surface, drafty seal, and uncovered opening gives the winter weather another way in.
Once your windows and underbelly are sorted, turn your attention to the remaining weak points:

- Doors: Check the seals and weatherstripping for drafts, just like you did with the windows. A draft stopper along the bottom can also make a noticeable difference.
- Floors: Cold floors are particularly miserable on chilly mornings! Rugs and carpet runners provide an easy insulating layer, while rigid foam board insulation beneath the floor, where your RV’s construction allows it, can offer considerably more protection for cold footsies.
- Roof vents and skylights: These are basically little holes in your otherwise cozy box. Insulated vent cushions or removable covers help prevent warm air escaping through them when they’re not needed for ventilation. Roof-mounted AC units, like a lot of the popular 12V air conditioning systems installed on RVs, can be another heat-loss point, so consider a compatible removable interior cover or insulated insert when the unit isn’t being used.
- Slide-outs: Slides introduce extra seams, seals, and exposed surfaces to your RV. Check the seals carefully and consider insulating exposed floors or adding interior insulation where cold spots develop.
- Cab areas: Motorhomes have an enormous additional weak point up front. Windshields, side windows, doors, and the cab itself can absolutely hemorrhage heat, so insulate those windows too or add a thermal curtain to separate the cab from the living area can work wonders.
You don’t necessarily need to turn your RV into a hermetically sealed Mongolian yurt. In fact, you shouldn’t — ventilation becomes extremely important once we get to moisture management. For now, the principle is simple: find the places where your RV is bleeding heat and plug the gaps.
Every degree you keep inside is one your heater doesn’t have to replace.
Water Systems: How to Prevent Your RV’s Pipes from Freezing
On to the topic of water now, and it’s a biggie. Winter can wreak absolute havoc on an RV’s water system.
Frozen water expands, and pipes, fittings, pumps, and tanks generally don’t appreciate the physics lesson. Worse yet, if your RV is rocking a high-quality water filtration system, that’s in peril too. Water trapped inside can freeze and crack the housing, damage seals or O-rings, split fittings, or break the filter cartridge itself.
So dodge the disaster! Let’s talk solutions.
Heated Hoses and Connections
A heated water hose is your comrade in arms in the fight against frozen water lines. Designed with built-in heating elements, these hoses will keep water flowing through seriously cold conditions. These elements warm the hose to prevent the water inside from freezing.
Most heated hoses are plug-and-play solutions. Simply plug them into a power source, and they’ll handle the rest.

For extended trips in cold areas, look for a drinking-water-safe heated hose rated comfortably below the temperatures you expect to encounter. Check the required power supply and hose length too — there’s no point owning a frostproof hose that stops six feet short of the spigot. But once you’ve found the best RV water hose for the job, the rest is pretty straightforward.
And don’t forget the connections either! A heated hose won’t do much good if the exposed spigot or fittings at either end freeze solid.
Insulate vulnerable connections with foam, insulated covers, or heat tape where appropriate, paying particular attention to the campground spigot, pressure regulator, water filter, and your RV’s city-water inlet. The filter, in particular, should receive special care or even be relocated into a heated compartment if your setup allows for it.
Skipping this step can be a lil’ bit of a newbie mistake when prepping for winter RVing. Some might feel it’s optional, but then again, so are seatbelts in some places…
Don’t take chances — protect yo’ pipes!
—Want my pick? Camco’s TastePURE Heated Drinking Water Hose is a reliable powerhouse straight from one of the leading outdoor recreation brands. It’s purpose-built for freezing conditions, rated to go as low as -20°F (-28°C) with a self-regulating heating element to keep the water flowing when temperatures plummet. Across many categories of RVing gear… in Camco we trust.
Protecting RV Pipes and Plumbing
Next, let’s talk plumbing. Heat cable (or heat tape) along with foam insulation is one of the gold-standard setups to keep an RV’s pipes from freezing in icy temps. Some four-season RVs will already be protected against this. But otherwise, insulating ‘dem pipes ensures the water inside DOES NOT turn into long-form popsicles!
Just like skirting, there are two main types of heat tape:
- Self-regulating heat cable
- Constant wattage heat cable

A self-regulating heat cable adjusts its heat output in response to the surrounding environment. The cold snap hits, the tape ramps up, and the risk of temperature-related damage drops.
Self-regulating heat cable is the more energy-efficient option in the long run. However, it also comes at a higher initial cost. It’s not your regular ol’ duct tape — it’s a bona fide low-maintenance solution!
A constant-wattage heat cable, conversely, produces a fixed amount of heat whenever it’s running. These systems can be paired with a thermostat that switches the cable on and off as temperatures rise and fall. They’re generally cheaper upfront, but lack the localized temperature response of self-regulating cable.
Installation is usually straightforward, but follow the manufacturer’s instructions carefully. Different heat cables have different requirements for positioning, fastening, pipe materials, and insulation. Once installed, compatible foam pipe insulation adds another layer of protection by helping keep that precious heat where you actually need it.
For a dedicated winter living setup, self-regulating cable is generally my pick. It costs more upfront, but automatically adjusting its heat output makes for one less thing to worry about when the blizzards and black ice come knocking.
Managing Fresh and Waste Water Tanks
Protecting your RV’s holding tanks is 100% essential to avoid disastrous freezing and damage. When water tanks freeze, winter RVing can turn from cozy to catastrophic very quickly.
Solid ice can crack tank walls and burst pipes. Worst-case scenario, you’ll be springing leaks that might go unnoticed until serious repairs are needed.
To prevent tanks from freezing, you have a couple of options:
- Tank heaters, or ‘heating pads’, are the most popular and effective. These pads stick directly to the underside of your fresh, gray, and black water tanks. Most are electric and come with built-in thermostats to regulate the temperature automatically. That said, four-season RVs may already protect their tanks inside a heated and enclosed underbelly, so check what your rig is equipped with before adding aftermarket heaters.
- Meanwhile, insulated tank covers provide another layer of protection, particularly in less extreme conditions or alongside another heat source. These wraps are basically tank blankets! They’re usually made from foam or reflective material to add a layer of insulation to your water tanks and slow heat loss. The only caveat is that they aren’t the best choice for extreme weather on their lonesome.
Finally, for your waste tanks, keep the gray and black tank valves closed and dump periodically rather than leaving them permanently open. Standing wastewater in an exposed sewer hose is just asking to become the world’s least appealing popsicle!

When it’s time to dump, empty the tanks completely, be sure to drain your RV’s sewer hose system so that it can’t get damaged too, and pack it away where possible. In sustained freezing conditions, pay particular attention to exposed dump valves and drain plumbing too — these may need the same insulation or heating treatment as the rest of your vulnerable water system.
Interior Heating Options: How to Make a Cozy Atmosphere
Now let’s turn our critical gaze inward. Snug as a bug in a rug is the goal! NOBODY likes sleeping cold.
But unlike heating at home, RV heating setups have some unique quirks to them. Limited space and variable power sources throw a couple of spanners into the works.
The trick is matching your heat source to where and how you winter camp. What works beautifully with shore power through a mild Tennessee winter might be terrifically useless boondocking at -10°F.
Choose the Right Type of Heating
When choosing your RV’s heating source, you’re mainly considering the following factors:
- Power source
- Climate
- And cost
In remote areas without shore power, a propane furnace or diesel heater is a smart choice. Otherwise, for those with access to electric hookups, heat pumps or space heaters are efficient options that reduce your reliance on fuel.
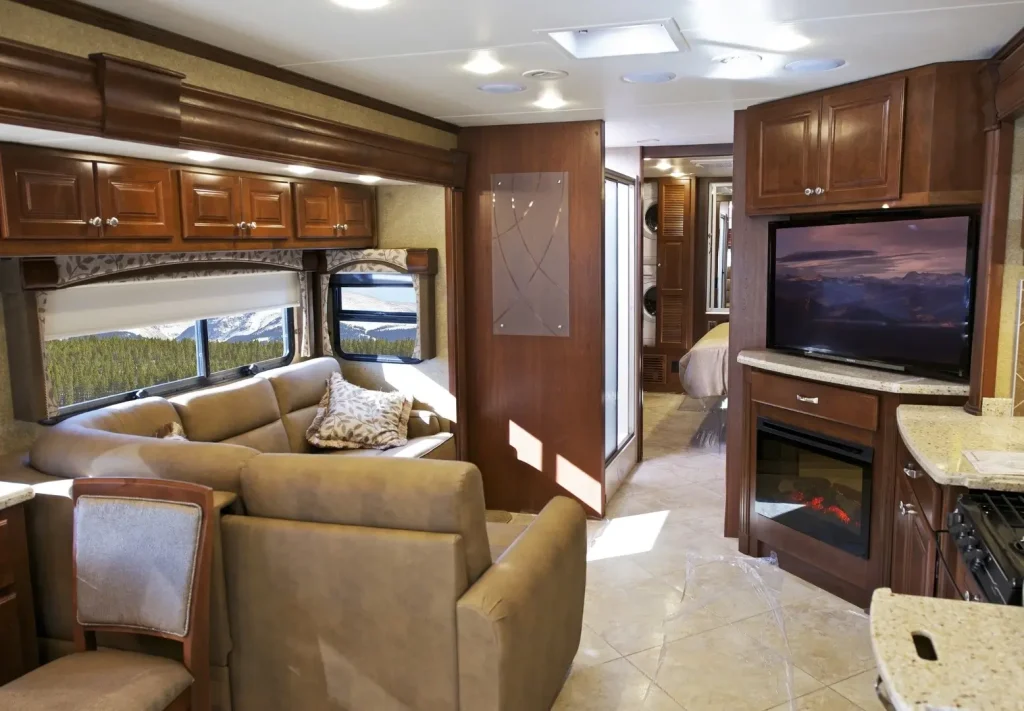
Consider where and how often you’ll use the heating too. If you’re plugged into shore power through milder winters, an efficient heat pump can do much of the heavy lifting. For sustained freezing temperatures or off-grid living, propane and diesel become considerably more compelling.
Let’s dive deeper into these options!
Comparing Your RV Heating Options
There’s no single best way to heat an RV in winter. But we can line the options up and find the one that’s right for you!
Here are the main contenders:
- Propane furnaces: These are standard in many RVs for good reason. Propane heaters get the interior toasty fast and also work without shore power. They do still need 12V power for the blower and controls, and it’s worth noting that frequent use can burn through your propane supply surprisingly fast.
- Diesel heaters: Another excellent option for off-grid and seriously cold conditions. Diesel heaters provide efficient, consistent dry heat without requiring shore power, although they still need some 12V electricity. The bigger catches with diesel units are the upfront cost and installation, as these are a relatively heftier heating option compared to heat pumps or even propane furnaces.
- Heat pumps: These essentially work like an air conditioner in reverse, pulling heat from the outside air to warm your RV. They’re impressively efficient in mild to moderately cold climates, particularly when you have a reliable electric hookup. But their performance drops as temperatures plummet, making them much less appealing once you start heading into the tundra.
- Electric space heaters: Simple, compact, and wonderfully convenient when you have shore power! A good space heater can warm a smaller RV or supplement your main heating system without chewing through fuel. Just keep your RV’s electrical limits in mind — a typical 1,500W heater already draws a hefty chunk of a 15A circuit.
And you don’t necessarily have to pick a winner either! Some of the best winter setups combine heating sources. A space heater or heat pump can handle milder weather while you’re plugged in, leaving your furnace or diesel heater ready to bring out the big guns when the winds really start roaring.

—Want my pick? Xtreme’s Cabin/RV Heater is a primo option for winter RVers. It’s compact, purpose-built for small RV spaces, and packs the thermostat and safety protections you want from a heater running inside your rig. Combine this electric heater with a more robust option, and camping in the snow suddenly gets a lot more appealing.
Or for a more comprehensive breakdown of your options and picking the right unit for your rig, check out our buyer’s guide for RV space heaters.
Curtailing Condensation: How to Minimize Moisture Inside Your RV
Managing moisture build-up inside your RV is also pivotal during winter. When you’re living in a small, enclosed space, things like cooking, showering, and even breathing can quickly raise the humidity levels.
If left unchecked, moisture leads to condensation on walls, windows, or, infuriatingly, your bedding. And that unwavering condensation ultimately leads to mold and mildew. That is certainly NOT the cozy winter vibe!

Mitigating your RV’s interior moisture helps protect it and you. The two big weapons here are dehumidification and ventilation: remove excess moisture from the air, while giving all that humid air somewhere to escape.
It might seem counterintuitive after spending so much time keeping the cold outside, but your cozy little winter box still needs to breathe!
Dehumidifier

First up, dehumidifying! (By way of a dehumidifier.) A dehumidifier is an oft-overlooked but nonetheless fantastic RVing gadget for winter living. This glorious gadget removes excess moisture from the air, helping to prevent condensation and all that pesky and malignant mold that comes with it.
Put simply, dehumidifiers pull moisture from the surrounding air and release drier air back into the space, killing a lot of condensation in the process. They’re a great choice for cozying up stuffy RV spaces.
There are oodles of options around, from high-end units to budget-tier dehumidifiers. But personally, I’ve found that even a small portable model like the ProBreeze — compact and energy-efficient — goes a long way in the war on wintertime RV mold!
Other Tips for Preventing Mold and Mildew
Dehumidifiers do the heavy lifting, but good winter moisture management is also about giving all that damp air fewer places to hide. Your RV still needs to breathe, even when every instinct is telling you to seal the hatches against the cold!
Here are a few essential tips and tricks for keeping the mold at bay:

- Ventilate when cooking and showering: Run your range hood, bathroom exhaust fan, or crack open a roof vent to push moisture outside before it settles. Yes, you’ll lose a little heat, but it’s worth it.
- Keep the air circulating: Cold, stagnant pockets behind mattresses, cushions, furniture, and inside cabinets are prime real estate for mold. Leave some breathing room around these areas and open cabinets periodically to get warm air moving through the whole RV.
- Dry wet gear elsewhere: Damp towels, jackets, boots, laundry… These all release moisture as they dry. Avoid turning your RV into a mobile drying rack, at least as best you can.
- Wipe down condensation: If water is collecting on various cold surfaces, such as windows or walls, don’t just let it sit there. A quick wipe in the morning can prevent that moisture from finding somewhere nastier to live.
- Monitor your humidity: An RV temperature and humidity monitor takes the guesswork out of moisture control. Ideally, aim to keep your RV somewhere around 30–50% relative humidity, adjusting your ventilation and dehumidifier as needed.
And keep an eye on the sneaky spots! Check beneath mattresses, inside wardrobes, around window frames, and behind furniture regularly. Mold loves the damp, dark corners you forgot existed.
Winter RV living is always going to generate some moisture. But the goal isn’t to eliminate every last drop; it’s to keep the air moving, the surfaces dry, and the fuzzy green houseguests firmly off the guest list.
Power Solutions: How to Keep the RV’s Lights on Through Winter
Winter is a hungry beast when it comes to electricity. Shorter days reduce your solar harvest, cold temperatures affect battery performance, and heaters, tank pads, heat cables, dehumidifiers, and all the other winter goodies we’ve just discussed add new loads to your system.
In short, winter RV camping means generating more power, storing it carefully, and budgeting it considerably better. Whether you’re plugged into shore power or boondocking in the snowy beyond, keeping the juices juiced becomes part of the daily routine.
Winter Battery Tips
Cold weather is rough, even on the best RV batteries. As temperatures drop, batteries become less capable of delivering their usual performance (and just as winter living starts asking more from them!).

But that’s why a few battery usage and maintenance tips help — a little winter power discipline goes a long way:
- Start charged: Head into remote park-ups with your battery bank as close to fully charged as possible. Winter is not the season to begin boondocking on half a tank of electrons.
- Monitor your state of charge: Keep an eye on your battery monitor rather than waiting for lights to dim and appliances to complain. Know roughly how much usable capacity your battery bank actually provides, and where your electric motorhome-boy is at.
- Protect batteries from extreme cold: Provided your setup allows it, keeping batteries in an insulated or temperature-controlled compartment helps preserve performance. Just make sure any battery installation still meets its ventilation and manufacturer requirements.
- Budget for winter loads: All those essential supplies and extra winter gear can substantially increase your daily consumption. Know what your system can realistically support before heading off-grid.
- Be gentle with lead-acid batteries: Avoid repeatedly discharging them. Cold weather already reduces their available capacity, and running them excessively low will shorten their lifespan further.
And remember that generating power and storing power are two different battles. A gigantic battery bank eventually becomes a gigantic empty battery bank if you can’t recharge it. That makes a reliable combination of shore power, solar, and even a portable generator equipped for RVing particularly important through winter.
Lithium batteries improve the equation considerably. However, they do come with one particularly important cold-weather catch.
The Caveats of Lithium Batteries
Lithium batteries are a fantastic fit for the RV life. They’re lighter, provide considerably more usable capacity than lead-acid batteries, and handle repeated cycling much better.
But winter introduces one very important catch: lithium batteries do NOT like being charged when they’re freezing cold.

For the common LiFePO4 batteries used in RVs, charging below around 32°F (0°C) can permanently damage the cells. Discharging in sub-zero temperatures is generally less problematic within the battery manufacturer’s specified limits, but recharging is when you need to be particularly careful.
Fortunately, modern lithium batteries increasingly account for this. Look for a battery management system (BMS) with low-temperature charging protection, which prevents charging when the cells are too cold. Better yet, there are heated lithium batteries with built-in heating elements to warm the cells before accepting a charge.
If you’re planning serious winter boondocking, that cold-weather protection is well worth having. Just remember that your solar panels might be raring to pump up the juice while your cold and sad battery very much is not.
Make Good Use of Shore Power
Oh, and another hot tip for winter RVing… ALWAYS keep your juices juiced!
In winter, access to power goes a long way for RVers. Plugging in at an RV park keeps your batteries charged and your appliances running. Not to mention those snuggly heaters.
When staying at established campgrounds, take advantage of electric hookups as a consistent power source for charging up. That way, you’re fully stocked when you go boondocking or dispersed camping in the wilderness.

Just keep an eye on your available amperage. Electric space heaters, water heaters, dehumidifiers, and other high-draw appliances can quickly stack up, particularly on a 30-amp hookup. Know what your RV’s electrical system can handle and avoid running too many hungry appliances simultaneously.
But in summary, keep yo’ electronic systems charged! Having a full battery when you’re off-grid can make all the difference between a comfortable night and a really, really crappy one.
Solar Power’s Limitations and Uses
Solar can still make a valuable contribution to your power supply in winter. A halfway-decent system serves as an excellent supplement to shore power or a generator; meanwhile, a properly sized RV solar setup can keep an off-grid battery bank topped up when the weather plays nice.
Fixed rooftop arrays provide plenty of set-and-forget convenience. But portable panels have one particularly juicy winter advantage: you can move and angle them toward the low winter sun.
And yes, solar panels absolutely still work in winter! Cold temperatures themselves aren’t the enemy — in fact, photovoltaic panels can operate very efficiently when they’re cold. Bright sun reflecting off surrounding snow can help in the right conditions too, usually with bifacial panels, so winter solar isn’t completely powerless. You might even get a shocking amount of juice (hurhur.)

The real bummerinos are shorter days, a lower sun angle, cloud cover, and snow sitting on the panels. All of that means you should expect a smaller daily energy harvest than you’d get from the same setup in summer. Make sure you calculate your RV’s expected power consumption before gleefully setting off into the dark.
Oh, and one last pro tip for winter solar power: clean your panels! Do this on the regular to remove any snow or grime and maximize power generation, and your solar will stay (relatively) stellar until spring.
Just make sure to consider them part of a broader winter-ready RV electrical system, not your sole lifeline.
Winter RV Travel: How to Make the Adventure Meet the Environment
Hitting the road in winter brings a whole slew of unique challenges. From icy roads to unpredictable weather conditions to freezing your bum off, there’s a lot more to consider once you’ve left the Californian sunshine behind.
RVing around the country requires thought. It does at the best of times, but quadruply so in extreme winter conditions. This is about your safety as well as the mechanical health considerations of your nomadic home.

But despite all my yurt references, you’re still not actually crossing Mongolia on horseback. You’re driving an ultra-fancy and highly-equipped mechanical steed! You just gotta winter-proof your RV travels as much as your RV living.
Before Anything, Get the Right Tires (and Chains)
Having the right tires on your RV will make or break your winter driving experience. Winter-specific tires are designed with deeper treads and softer rubber compounds. This combo both maintains the tire’s flexibility while gripping better on ice and snow.
For regular winter travel, all-weather tires carrying the Three-Peak Mountain Snowflake (3PMSF) symbol offer a solid year-round compromise. But for harsher conditions and regular travel through snow and ice, dedicated winter tires are the real deal. And then, when conditions or local regulations demand even more traction, you’re going to want tire chains.

Strapping a set of tire chains on your mechanical steed is like giving it ice-resistant horseshoes. They seriously up your RV’s traction on icy surfaces. Check your RV or chassis manual for chain-clearance requirements before buying a set, then put on snow chains safely by carefully following the manufacturer’s instructions and ensuring they’re properly tensioned before hitting the road.
Keep in mind, however, that chains should only be used when road conditions warrant them. There may be specific speed limitations or regulations regarding their usage — always check local laws and conditions as you pass through new areas.
Lastly, while tire maintenance is always important, it’s a 100% necessity in winter. Cold weather has a tendency to lower tire pressure, so you’ll need to monitor their inflation levels closely. Check your tires cold and keep them at the manufacturer-recommended pressure for your properly loaded rig — winter snow and ice aren’t really the conditions for freestyling your PSI.
Route Planning is Key — Weather Forecasts, Campground Availability, and More
And the last tip for safe winter RV travels: always plan ahead.
Winter weather is unpredictable. Snow, fog, blizzards, sleet, black ice… It’s actually a rather wild ride!
Have a solid plan for where you’re going and how you’re getting there. PLUS be flexible: have backup Plans B, C, and even D should things go awry!
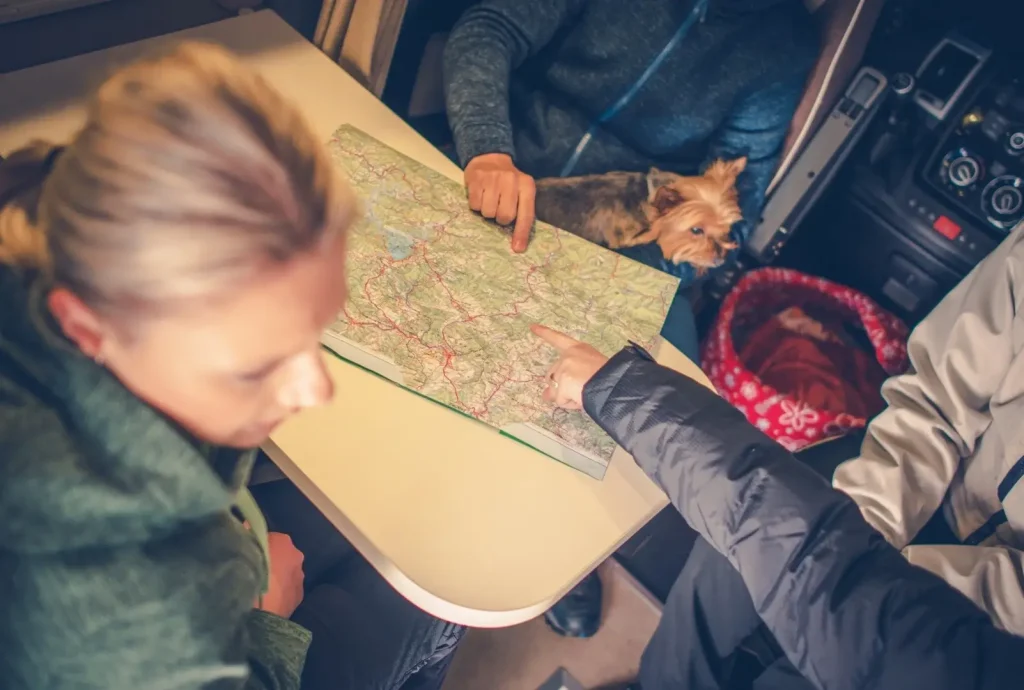
That means doing your homework to prepare for whatever Mother Nature throws your way.
- Research your route ahead of time, including mountain passes, seasonal road closures, and any chain or traction requirements.
- Identify potential overnight stops and confirm campgrounds are actually open during winter.
- Know where you can hook up, refuel, and resupply along the way, particularly before heading somewhere remote.
- Check the weather forecast a few days ahead and monitor road conditions as your departure gets closer.
- Check again on the day you leave. Conditions can change rapidly.
- And definitely divert or delay if extreme conditions are forecasted.
- (And on an obligatory but nevertheless pivotal note, make sure you’re topped up with a comprehensive RV roadside assistance plan.)
Be flexible. Plan for contingencies. Don’t stress if Plan A falls apart.
Winter RV living and travel is about meeting reality on reality’s terms. You can’t control Mother Nature!
But you can collaborate with her. 😉
Wintry Roads Require Safe Driving!
Winter driving is no joke. How about some gnarly statistics?
- Roughly 220,000 U.S. vehicle crashes occur during freezing precipitation in an average year.
- Those crashes injure more than 34,000 people and kill more than 400 annually.
RVs, given their much larger statures, require extra care in cold, slick conditions. Control is harder to maintain. Stopping distances increase. Road shoulders can be snowed in (meaning you’ve got even LESS room to maneuver).
Driving an RV on icy or snowy roads demands your utmost concentration AND a good head for preparation. What you need are some essential tips for safe driving and, ultimately, survival:
- Slow Down. Duh! Drive slower than you usually would in winter. Ice and snow require more time to stop, so loosen that accelerator and give yourself plenty of time to react.
- Brake Gently. Sudden braking can send you skidding on slick roads, particularly in a hulking RV. Instead, use smooth, progressive braking that gently transitions into slower and steadier stops.
- Check Your Trailer Brakes. If you’re towing a travel trailer or fifth wheel, make sure the trailer brakes and brake controller are properly adjusted and working before heading into winter conditions. Several thousand pounds of trailer is not something you want developing independent ambitions on an icy descent.
- Increase Following Distance. Leave considerably more space than you would in dry conditions between you and the vehicle ahead. If you’re usually a butt-kissing tailgater, leave at least triple. Or… y’know… just stop tailgating.
- Beware of Black Ice. Be careful with bridges and shaded areas: they’re particularly prone to freezing. Treat suspicious dark or glossy patches as ice. Gently reduce your speed every time just to be safe.
- Don’t Lose Traction. If you start to fishtail, DO NOT slam the brakes. Ease off the accelerator and steer smoothly where you want the vehicle to go as you regain control.
- Watch for Wind Gusts. Strong crosswinds and lumbering motorhomes are not good bedfellows. Slow down, keep both hands on the wheel, and if the winds start pushing your rig around, find somewhere safe to pull over and wait them out.
- Use Low Beams in Snowstorms. Your high beams actually reflect off snow and reduce visibility. Stick to your standard headlights for better sight.
- Keep a Winter Emergency Kit. It’s a must-have for the RV life! In your kit, carry the winter essentials. This means things like emergency blankets, a first-aid kit, a flashlight, a shovel, an ice scraper or snow brush, etc. Oh, and take extra food, water, and warm clothing too in case you get stuck somewhere.

The Remaining Tips and Tricks for Comfy Winter RV Living
By now, we’ve insulated the rig, kept the water flowing, beaten back condensation, figured out the power, and learned how not to send several tons of RV skating into a ditch.
What’s left are the little things: the winter RVing tips and tricks that make living through the cold less about survival and more about actually enjoying your cozy little snow globe.

- Winterize your bed too. A quality cold-weather duvet, flannel sheets, or an electric blanket can make those frosty nights downright luxurious. RV beds often sit above storage bays or other poorly heated spaces, so you want to do everything in your power to get your bed as warm as possible.
- Give your mattress room to breathe. Warm bodies meeting a freezing-cold bed platform can create condensation underneath the mattress. A breathable under-mattress mat or ventilating layer helps keep air circulating. And periodically lifting the mattress for an airing is key, or you may find yourself replacing your RV’s mattress sooner than you’d like.
- Open those cabinets in serious cold. Plumbing beneath sinks and along exterior walls doesn’t always receive much cabin heat. Opening the cabinet doors lets warm interior air circulate around those pipes when temperatures really plummet.
- Keep an eye on snow accumulation. Your RV’s roof isn’t just a convenient place to store this week’s snowfall! Watch your roof, vents, slide-outs, and slide toppers as the snow piles up, and never allow snow or ice to obstruct appliance vents or exhausts.
- Clear your slides before retracting them. Snow and ice sitting on a slide roof or topper can cause a whole lot of grief when it’s time to pack up. Clear the accumulation safely rather than asking the seals and slide mechanism to munch through a frozen layer of winter.
- Create a wet-gear zone. Snowy boots, jackets, gloves, and tiny RV interiors are a recipe for one helluva soggy mess. A boot tray and dedicated spot near the entrance for wet gear keeps the slush contained and all that extra moisture from spreading through your living space. While there are various ways to accomplish this, even a cheap pop-up tent or vestibule outside can be quite effective.
And finally, don’t forget to actually enjoy the damn thing! Winter RVing takes more preparation than chasing 75°F around the country, but that’s part of the trade.
Once the systems are sorted and the snow is falling outside, all the challenges of winter RV living, ironically, melt away. There are considerably worse places to be than tucked beneath a warm duvet in your own little home on wheels.
Is RVing in the Winter Worth It?
Oh, too damn right it is! Stillness. Frosted mornings shared on your breath and the native flora alike. Frozen lakes, silent, and without a soul in sight. Hell, man… camping under the Northern Lights.
Sure, you could winterize your RV for the off-season instead. Winter RV living encapsulates something that crowded RV parks and busy summer camping never could. The only thing you need to remember is—
Preparation and collaboration are the keys to success. You gotta meet winter on winter’s terms.
Play by its rules, and you’ll get wonders untold. Don’t and… well… we all know how Into the Wild ends.
So take the important gear. Monitor your power usage. Keep your pipes un-frozen and your windows un-condensed. Take a damn good duvet. Ideally, take a cuddle buddy too.
And if that ain’t an option, then my final pro tip is to take a hot water bottle instead.
Even us lonely winter nomads need a good snuggle sometimes. 🙂


Awesome article