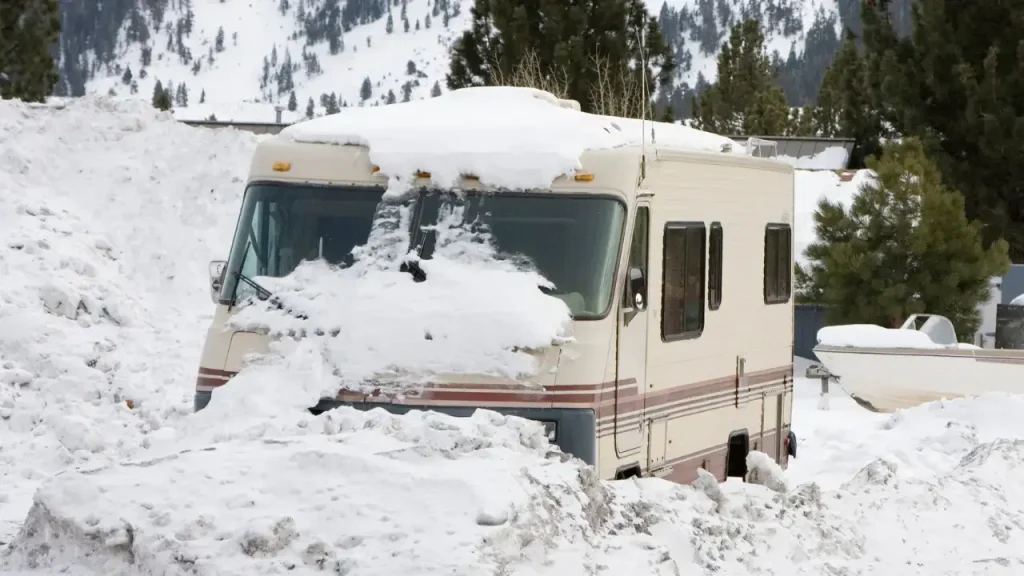
Brrr, looking chilly there, Winter Warrior. That’s probably because you haven’t insulated your RV’s underbelly. But fret not, because we’re bringing you the BEST RV skirting for winter camping!
The underbelly of your RV is an oft-forgotten section when winterizing your portable home. And that’s a shame because it’s absolutely crucial. All that uninsulated space, infrastructure, and freezing-prone water systems are going to lead to some seriously frosty sleeps in winter settings.
Now there are a lot of solutions to this problem. They range from the cheapest of MacGyver-style DIY jobs (did someone say straw and bubble wrap?) all the way up to tailor-made insulation built by a professional.
However, there are accessible and innovative products too. They’re a perfect fit for RVers who want professional insulation standards on a cheaper budget. And of those picks, RV AirSkirts are taking the RV world by winter storm.
As far as RV skirting solutions go, AirSkirts are a super easy-to-use and super easy-to-get right choice! Honestly, they’re pretty foolproof.
But beyond that, you have a lot of other options for underbelly insulation. There’s a lot of info to cover in this post. It’s a rather dense topic, but I promise I’ll break it down real simple for you.
And from that, you’ll come away with one realization: that winter skirting IS the best underbelly insulation solution.
But I’m getting ahead of myself! There’s so much between there and now. Let there be no more shivering nights under the stars.
Get some junk in the trunk! It’s time to beef up your RV’s underbelly.
Why is it Important to Insulate an RV’s Underbelly for Winter?
Ok. Picture this. You’re camping somewhere cold.
But think, like, cooold. Dead trees, ice, and snow all around.
You felt prepared for the realities of winter living in an RV when you arrived at camp. The RV is locked up tight… You’ve insulated the walls. You’re stuffed up to the eyeballs with an assortment of cozy pillows and blankets.
Yet, still you’re cold because cold air is entering your RV somehow.
See, there’s one missing ingredient in this supposedly winter-proof RV. The RV’s frostbitten Achilles’ heel: its underbelly.
Now, don’t worry! I learned this the hard way myself across many cold nights in frosty landscapes. It’s not as bad as your passenger door falling off in the middle of winter (sighh), but that’s another story.
There’s a lot of space in the underbelly. Not big enough to fit a hippopotamus. But big enough for a couple of key things that need insulation:
- Plumbing Lines – These are especially vulnerable to freezing in cold weather if not properly insulated (or heated).
- Holding Tanks – Much the same, the last thing you want is a frozen holding tank. (You might also want to look into a tank heater or the best tankless RV water heater models with built-in freeze protection for further system winterization.)
Furthermore, tucked down there in the underbelly are often a few other things to consider:
- Electrical wiring
- Ductwork for heating/AC
- The frame and chassis
All of this means more uninsulated space and infrastructure. While many RVs have some form of insulation in the underbelly, it’s not enough for a toasty night’s sleep in extremely cold weather. Or to stop drafts from blowing in on wild, winter nights.
The last thing you want is frozen pipes or tanks! That’s a breakage and very likely an expensive one.
But you also don’t want a cold night’s sleep. Well, I don’t personally. (Protip: get a hot water bottle.)
By now, you’re getting the idea. If you’re going to freezing conditions. Like freezing cold…
Then you gotta get some sort of jelly in that belly. Insulate away!
The Types of Underbelly Insulation for an RV
There are two broader types of insulation for your RV’s underbelly. When insulating, choosing between these two types is the first thing you’ll need to decide.
Permanent RV underbelly insulation is for fully committed RVers who’ve made their vehicle their permanent homes. Permanent insulation is usually professionally installed and expensive. But if you’re living full-time in an RV on your property or long-term at an RV park, it’s definitely the way to go.
Permanent insulation is thicker and much warmer than DIY or standard insulation solutions. And built to last too, ensuring that your vehicle remains warm for years. (Ideally, as long as you have the RV.)
Or you have a much cheaper and more flexible option: temporary RV underbelly insulation. Easy to set up and dismantle, it’s perfect for part-time to casual employees of the RV organization.
Whether you’re on a winter wonderland adventure or just occasionally roll into cold climates between sunsets, it’s the final edge your RV needs for that toasty night’s sleep. I’ve met several snowbirds during my journeys who swear by it, especially when they don’t want to commit to a permanent solution.
These insulations can be anything. From foam boards to heavy-duty fabric skirts, up to some really innovative solutions. And they’re all going to seize back some degrees inside your little motorhome from those wintry nights.
That is of course, only once you install them, so let’s get into that right now.
How to Install Insulation for an RV’s Underbelly: Fast Guide
Easy! Well, medium-easy. But you got this! Unless you don’t, but there are solutions for that too.
If you’re installing RV underbelly insulation yourself, then what you need to do is:
- Prep the area – Before anything else, clean and dry the underbelly. Grime, dirt, and moisture are not good friends with insulation. Give your RV a good hose down, scrub if necessary, then let it dry fully. (While you’re at it, this is also a great time to apply a high-quality coating of RV wax; it doesn’t help with insulation, however, winter has just as many environmental nasties as summer to protect your rig from.)
- Choose your insulation – We did this, remember! Do you want permanent or temporary insulation? It all depends on your travel plans, the climate, and your RV lifestyle.
- Get the tools ready – You’ll need some basic tools. At the very least, the insulation you’ll be installing, a utility knife, measuring tape, plus whatever is securing the insulation. Oh, and gloves are a lifesaver!
- Install it – Start by measuring the underbelly area. And then measure again! Once you’re 100% sure, cut your chosen material to fit. Foam boards or permanent solutions should be cut to fit snugly and without any gaps. Then, spray your adhesive and stick them on, pressing firmly. For fabric skirts, it’s a bit different. Secure them around the RV’s edge (most come with snaps or velcro). It’s simpler and quicker, but make sure they cover the entire underbelly – gaps are the enemy!
- Test it – There’s no time like the present! Give it a good test first. Feel around for any cold drafts or loose spots and fix them up. Then take your ride for a cheeky overnight camp and see how it goes!
If there are any more issues after your testing, patch them up. You might have to take it to a professional though if you can’t fix it yourself.
And that’s about it! Installing underbelly insulation is about medium-tricky. Out of all the options, fabric skirts are probably the simplest of the lot.
But this insulation is essential for a truly luxe ride. Or, honestly, just to sleep comfortably in certain places in the world! Do it right, and your RV will thank you with warm, cozy interiors.
What is RV Skirting and Does it Work?
Now enters a new player into the RV underbelly insulation arena – winter skirting. Light on its feet, hard-hitting, and resilient too, this fighter is not one to take lightly.
So what is it? Simply put, RV skirting is a protective shield (like the aforementioned fabric skirt). It wraps around the lower part of your RV. You could think of it as a cozy blanket for your RV, but I like to imagine it’s a skirt. The mental imagery is funny.
It can be made from a variety of insulating materials, and it protects hard against cold air and drafts. It also helps to trap warm air. Additionally, it adds a layer of protection to your RV. It keeps out snow, critters, and even debris. Basically, it keeps your RV warm.
It’s a real game-changer on those chilly nights chilling in the mountains. Skirting can bump up your RV’s internal temperature rather significantly. PLUS it also saves on costs if you’re using a space heater in your RV too.
However, the key is the right fit and proper installation. Gaps or loose fits reduce the effectiveness (and also significantly). So, it’s vital to ensure your skirting is snug and secure.
In short, RV skirting isn’t just a fancy accessory. It’s practical, like a skirt with pockets. You get the flexibility of something that can be removed without losing the utility of better insulation when you need it. For many seasoned RVers, it’s a winter essential!
So you know what you have to do. Grab that skirt. Suit up. Put that winter skirting on your RV, and curtsy too!
An Autobot has gotta have flair.
Different Types of RV Skirting: Options and Materials
Right, so, jokes aside, I really do mean it when I say it’s like a skirt for your RV! Just one equipped for the Alaskan tundras.
(It’s also worth mentioning that some winter insulation is also very effective for insulating against hot climates.)
Much like a skirt, you have choices in style and material, and this is a crucial choice. Over the years, I’ve seen many types of skirting. But each comes with its quirks.
Ready to accessorize with one of the flyest and best RV accessories around? Let’s dive into these RV skirting options!
Vinyl Skirting
Ahh, vinyl. This material is popular for good reason! It’s flexible and weather-resistant. Rain or shine, vinyl stands firm.
Plus, it’s super easy to clean! A simple wipe-down and it’ll look good as new. But be warned: in extremely cold temperatures, vinyl can become less pliable. Handle with care.
Plywood Skirting
Old school, but gold school! Plywood offers rigidity. It’s sturdy and can stand up to strong winds (the Achilles’ heel of the skirt!).
Installing it takes more effort, but that’s why plywood skirting is so durable. The downside is that it’s heavier than most materials and can be trickier to store than something more malleable.
Foam Boards
Lightweight and effective, foam boards provide solid insulation. Any rigid foam board will get the job done. They’re easy to cut, fit, and secure.
Unfortunately, foam board skirting isn’t as durable as other options. And make sure you secure them well. Otherwise, a strong gust might take them for a ride!
Straw or Hay Bales
Nature’s insulator. Straw or hay bales are excellent for temporary setups. They trap heat and block drafts. Plus, they’re biodegradable too!
But as the insulator of Mother Nature, so too does it attract her children. That is to say, critters love a sneaky nap in the hay. So be mindful if you’re set up in an area with lots of wildlife.
Tarps
For the runner-up cheap-as-chips option (unless you have free bales of hay lying around your house), try tarps! Honestly, in my opinion, a few tarps are extremely useful to have in storage in your motorhome and a no-brainer must-have item for RVing year-round.
Tarps can be layered to create a windbreak.
They’re easy to find and quick to set up. But they function more as a wind guard to block cold air and drafts and offer minimal insulation against the cold. I’d pair them with another insulator for the best results.
Snow
And now, crown champion of the cheap-as-chips contest, snow is nature’s other gift to the winter camper! Piling snow around the RV is a surprisingly effective natural insulator. It sounds strange, but snow traps heat.
It’s an especially useful survival tip if caught off guard by a snowstorm. Snow provides a good emergency fix, but it’s dependent on there being snow around and isn’t strictly a solution.
The Best RV Skirting for Winter: Our Top 5 Solutions
But how about some solutions?
In the end, the best material often depends on your needs, location, and budget. It also might take some experimentation.
However, if you’d like to skip the major DIY project complete with reinstallations per experimentation, I have better ideas!
Sink your teeth into these three solutions for winter skirting. If you’ve got the cash for it, they’re A LOT easier to install. And they’re guaranteed to keep you snug in all the winter camps!
1. RV AirSkirts

First up is the pricey but majorly convenient option. If you’re seeking an innovative solution for RV skirting that maximizes ease of use, let me introduce you to RV AirSkirts. Made for easy setup and packdown, this product seamlessly blends convenience with performance – it’s a top way to winterize your RV without disrupting the mobile lifestyle it enables.
They’re kind of like a life buoy for your RV. Or they look like one anyway. Specifically, they’re titled “The Inflatable RV Skirt”. So I’m not the only one that thinks that!
Constructed from heavy-duty, puncture-resistant vinyl, they’re basically inflatable tubes that you use to plug up your RV’s underbelly. Durable, efficient, and, most of all, simple! They create a solid seal around your RV, trapping air as a natural insulator against Jack Frost’s worst.
But even better is the process. Say goodbye to drilling and taping and hello to a 30-minute setup time! With the provided 800W air pump, you’ll have these skirts up and ready that quickly. And then, when you’re ready to move, you just deflate them, pack them into the carry bag, and off you go!
It’s this portability and elegance that makes these RV skirts such a fantastic choice. Particularly for casual RVers or winter warriors who only want the MOST temporary of solutions.
Now, with RVs coming in so many sizes, ensuring a perfect fit can be a tad tricky. Luckily, AirSkirts comes through again here! Before shipping every order, an engineer personally reviews them to ensure compatibility.
However, it still might not be the perfect fit for a couple of reasons.
Firstly, as far as temporary solutions go, it’s an expensive choice. Both DIY solutions as well as the other products above are considerably cheaper. It’s also not suitable for anyone seeking an RV skirting solution that doesn’t require packing down every time you move camp.
But if you’ve got cash to splash and are a sucker for all the convenience without any of the commitment, it’s a spot-on product. RV AirSkirts have revolutionized the game by eliminating the need for clunky, traditional setups. And it’s sure to Inflate your expectations!
2. RV WindSkirt
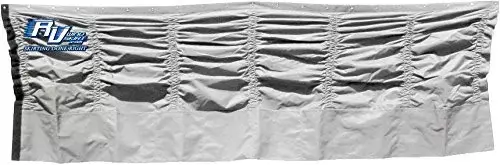
Okay, now we’re dropping the price right down. The RV WindSkirt is a more budget-conscious product but with some serious innovation still on offer!
First up, this patented skirting system boasts the ability to fasten directly to any ground surface. In fact, the RV Windskirt advertises itself as the market’s sole skirting solution with ground-secure technology. This makes it a versatile solution equipped for comfy campgrounds and off-grid dispersed camping alike. No matter the quirks of your campsite, flat or bumpy, it’s got you.
The WindSkirt creates a robust wind barrier beneath your RV. So your RV will be tucked in snug as a bug for a good night’s sleep! The best part is that there’s no mucking about with rods or stakes either. Just fill the bottom pockets with something heavy like rocks and you’re locked in.
As for the skirting itself, it’s made from tear, fade, and fire-resistant material. Plus the velcro fasteners between panels ensure a seamless fit the entire way around your vehicular igloo.
But it’s not perfect. This is by far the cheapest solution, but it’s also the trickiest to install. You will need to drill and perform some light DIYing.
Furthermore, it does live up to the name “wind skirt” too. It’s the lightest and least durable material on this list. If you don’t secure it well in high winds, you might catch your RV having a mild Marylin Monroe moment.
But it’s cheap, and it’s still a lot easier to install and use than a full-blown renovation product. If you’re going hard on the winter exploration, I’d say the previous skirting solution will be more equipped for the adventure. But if you’re only casually venturing into arctic conditions and just need a cheap, emergency option, the WindSkirt is the pick for you.
3. EZ Snap RV Skirting

Next up is the EZ Snap RV Skirting.
Constructed of durable vinyl, its tear and puncture-resistant material is ready to be the thorn in any thorny bush’s side.
Though not as foolproof as inflatable tubes, the EZ Snap is still a MUCH easier solution than something DIY. Thanks to the patented EZ setup and the solid grip of the extreme hold adhesive, you’re looking at a no-drill, no-hassle system! There’s no arsenal of tools or degree in mechanics required.
With stick-on fasteners that lock the skirting in place and pins to secure the skirting (which looks like an awning of sorts), it really is the plug-and-play solution. Its versatility is commendable too! Differences between RV classes be damned; whether you’re flaunting a Class C, B, A, travel trailer, or anything else, the EZ Snap is designed to snuggle with them all!
However, there are also a few downsides that separate it from its competitors. Though very hardy, the plastic pins and caps might not hold up in intense and galeforce conditions. Also, although It’s friendlier on the wallet compared to the likes of AirSkirts, it’s still not cheap. And definitely not as cheap as a DIY option.
Lastly, it may be a temporary solution, but be careful with the setup and pack-down process, and try minimizing it too. Constantly putting it up and taking it down might reduce the product’s lifespan. It’s a good option for setting up weekly campsites, but is better used for emergencies only in short-term (e.g. overnight) settings.
That said, there’s a solution for everything! The EZ Snap is a top-notch solution for effective RV skirting. And if anything breaks, replacement parts are easily orderable and not expensive either.
If you’re on the hunt for a cost-effective skirting solution that brings both accessibility and durability in spades, this is a very solid pick. Let there be no more icy cold sleeps!
Snap into action with EZ Snap.
4. DIY RV Skirting
Rolling on a shoestring budget or just love a hands-on project? DIY RV skirting offers a perfect blend of cost-saving and creativity!
We briefly covered this with the material options earlier, but let’s dive into the full list of common materials that people use for a DIY skirt.
- Plywood – Simple, yet effective. Plywood panels can be cut to fit the base of your RV. You should paint them to boost durability and match your RV’s aesthetic, and you can fasten them using screws or hinges for easy removal too.
- Insulated Tarps – These aren’t your standard blue tarps. Heavy-duty and insulated, they can be clipped or tied to your the underbelly. Plus they’re weather-resistant and easy to pack away.
- Foam Board Insulation – Easily available at hardware stores, foam boards can be cut to snugly fit around the underbelly. Attach them with adhesive or tape for an extra layer of insulation.
- Straw or Hay Bales – Old school? Yes, but a tried and true classic through and through. Stacking them around your RV not only insulates but adds a rustic charm!
- Bubble Wrap – Believe it or not, this works! Double up this packing staple for quick, temporary skirting. It’s lightweight, cheap, and can trap air for added insulation.
- Reflective Insulation – Similar to shiny sun protectors for car dashboards, larger rolls can be cut and placed around your RV, reflecting cold away.
If you’re going to be getting your hands dirty, make sure you prep for it! Ensure all your materials and tools are ready before you start to eliminate any unnecessary trips to the hardware store.
And Google hard too! There are heaps of resources online for making your own RV skirt and installing it DIY-style. YouTube is particularly great for this.
5. Custom RV Skirting
On the other end of the spectrum, for those with a boatload of cash and wanting the truly bespoke touch, custom skirting promises precision and elegance. Designed to perfectly fit every nook and cranny, these solutions offer unrivaled protection and style for your RV’s underbelly.
Let’s delve into the world of tailored RV winterization.
- Professional Fabricators – Specialists ready for the job, fabricators take detailed measurements of your RV to design skirting that fits like a glove. Using high-grade materials and a professional touch, this solution will ensure longevity and optimal insulation.
- Vinyl with Custom Graphics – Want a dash of flair with your solution instead? Custom vinyl skirting can be imprinted with graphics of your choice. Showcase your favorite landscape, wildlife, or even your RV’s name!
- Magnetic Skirting – A brainchild of innovation, this skirting uses magnets to attach firmly to metal-based RVs. Custom-built for your RV’s size, It ensures a tight fit while making installation a breeze.
- Snap-On Systems – Essentially, this is the EZ Snap product. However, if you want the perfect fit, get it done by a professional.
- Insulated Double-Layered Skirting – For those venturing into forgotten frontiers, double-layered skirting offers the maximum insulation possible. Nothing will ever be as toasty warm as double-layered protection.
- Customized LED Skirting – Winterization and top-shelf RV gadgetry in one: turn your adventure machine into a rave machine! Skirting with embedded LED lights not only looks dazzling at night but also ensures your RV is visible in low-light conditions.
Of course, before selecting a professional, do your research. Read reviews, talk to other RVers, and find a tradesperson you trust.
The last thing you want for your beloved home-on-the-go is for it to be mishandled by some miscreant. Find the best and never look back.
Our Verdict: What’s the Best RV Skirting for Winter?
Curtsy, bow, and over and out! By now, you should be welllll prepared for the task of insulating your RV’s underbelly.
There’s such a wealth of good options for securing this overlooked component of RV winterization. And so many options fit for all levels of handiness!
Of course, as far as simplicity to price to cold resistance goes, there’s only one all-around competitor to outshine its competition. And that is winter RV skirting.
Nothing is quite so durable and effective at insulating the underbelly of your RV without turning it into a mammoth project. There are heaps of choices out there for RV skirting, however, if you ask me, there can be only one.
Though not cheap, the simplicity and portability of this product are simply unmatched in the RV skirting game. Not to mention its durability and effectiveness.
But if that doesn’t do it for you, then grab some hammers and whatever else you need! From plywood skirts to vinyl to something that lights up your day, there are almost too many choices.
But that’s why you have this guide, courtesy of RV Properly. Come back anytime, friend, and get the info you need. Even if you choose to store your rig over winter, come back when it’s spring and time to dewinterize your RV!
I’ll still be here with answers for you. Unless I’m not.
In that case, you’ll find me in the mountains. Freezing my butt off and loving it!
Because beaches are basic. And the best adventures take work.
But you wouldn’t go hiking without a thick pair of fluffy socks, and neither should you go winter camping without a skirt.
A nomad’s gotta have flair.