How to winterize an RV? This is probably the biggest obstacle you’ll ever face in your RVing journey.
It’s a long and tedious process, and whether you’re a pro or a newbie, we all feel the same pain.
But with somebody to guide you along, the process becomes a lot more manageable. That’s why we created this comprehensive guide.
From the gear needed to valuable tips from someone with 4 years of RVing experience, you’ll find everything you need to know about winterizing your RV in this article.
Gathering Materials and Supplies for Camper Winterization
Let’s start with the stuff you’ll be needing:
- Antifreeze: Duh. How would you keep your RV from freezing? Antifreeze of course! More specifically, you’ll need non-toxic antifreeze which is meant for drinking water systems. Assuming you have a medium sized RV, you’d need roughly two to three gallons of non-toxic RV antifreeze to get the job done. You can find this at your local RV store or online if you’d prefer.
- Water Pump Converter Kit: You’ll need this to connect the water pump to your jug of RV antifreeze and pump the antifreeze straight into your water system.
- Wrenches, Screwdrivers, Bucket, Towels: This is rather obvious, but I decided to include them just so that no one can go “Oh but Julie, you didn’t tell me I’d need wrenches and towels!”
- Bypass Valve or Kit: The water heater bypass valve or water heater bypass kit prevents antifreeze from entering the hot water heater. Some RVs may already have it pre-installed, but if not, you’ll have to get it and install it yourself.
- Caps or Plugs: Last but not least, caps, or plugs if you prefer, are for sealing the drains of your tanks and water heaters, ensuring that antifreeze doesn’t leak out from these drain points.
Once you’ve gathered all your supplies, it’s time to roll up your sleeves and get to work.
The Process: Step-by-Step Winterizing Checklist
Make sure to follow every step carefully. Skipping even a single one out of laziness can literally lead to your RV breaking down in the freezing temperatures, so don’t sabotage yourself by being lazy.
Step 1: Disconnect external sources – water, batteries, propane, and solar panels
I like to compare winterizing an RV to performing surgery. You’ll need to first put your patient to sleep, then prep him or her for surgery, before finally starting the surgery.
The first step is to put your RV to sleep. We’ll start by disconnecting all the things that have kept your RV going the past summer.
Water: Detach the water hose from the city water inlet and switch off your water supply. You also need to make sure there is no leftover water inside the hose, so shake it a few times. Then, store the hose in a dry area.
Batteries: Disconnect your batteries and take them out of the battery box. Then, clean your terminals with a solution of baking soda and water to prevent any sort of corrosion. Finally, put some petroleum jelly on the terminals for an added layer of protection. Once again, store the batteries in a cool, dry place.
Propane: For propane, before you do anything, you need to turn off the propane tanks. Then, detach your hoses from the regulators. Now, use plastic bags to cover the regulators and keep them on using rubber bands or something similar. Then, keep your propane tanks in a well-ventilated place, far away from any heat sources.
Solar Panels: Lastly, separate your solar panels from the charge controller and bring them down from the roof. Give them a wipe down with a soft cloth, before storign them in a dry area.
After you’ve put your RV to sleep, you need to prep it for surgery.
Step 2: Clean, inspect, and prep interior and exterior of the RV
Before you operate on your patient, you need to make sure he or she is cleaned up and in the right position before you start the operation, so that’s what we’ll be doing here.
Interior: Your RV will be sitting stagnant for a long while, so you don’t want to leave any stains or food lying around. Clean every surface in your RV, including the kitchen living area, storage compartments, and of course, the bathroom. Just make sure the cleaning agents and solutions you use are safe for RVs. Also, don’t leave any food lying around unless you’re sure they can withstand being untouched for a few months.
Moving on to the refrigerator and freezer, you need to clear all the contents and then give them a thorough clean. And the doors should be open so that mold won’t grow. Once all these are done, you’re done with the interior of your RV. Close the curtains so that they don’t get damaged by the sun, and turn your attention to the exterior.
Exterior: For the exterior of your RV, you’ll need to clean it thoroughly and wax it after. You’ll need a ladder too to reach the roof or the higher areas.
Now, do one last check for cracks or damages of any sorts. If you find any, repair them as appropriate using sealant, tape, or other RV-suitable materials.
Cover your RV with a tarp or any sort of breathable cover and make sure the doors and windows are all locked and secured. And lastly, the wheels need to be chocked.
Step 3: Remove and bypass inline water filters
Step 3 is to remove and bypass your inline water filters. This is so as to ensure there won’t be any freezing or clogging of your water systems.
Before you begin, you need to find where your water supply is. Usually, it’ll be either near the water pump, behind the toilet, or under the sink.
You’ll then need to switch off your water supply and open one of the faucets to relieve pressure.
Here’s where you’ll need to be a bit more careful. Gently unscrew your filter housing and remove the filter cartridge. These two parts are easily scratched and damaged, so it’s imperative that you don’t use too much force when handling them.
As for the filter cartridge, whether you want to reuse it again is up to you. If you decide to do so, clean it and keep it in an airtight bag, and store it in a freezer.
We’ll now bypass the water filter. There are bypass kits you can buy, or you can just use a tube. All you have to do is connect the tube to the two ends of the water line where you took the filter out from. And of course, make sure to tighten the connection. You can use clamps or tape for that.
Step 4: Drain and flush the black, gray, and fresh water tank
Once again, you’ll need to find the hoses and valves. These could be under your RV, near the bumper, or in a compartment.
Next, put on gloves and goggles and find a bucket to put under the valves.
Black Tank: Open the valve, letting the tank drain all the way, and close the valve once the tank is empty.
Gray Tank: Same as with the black tank, open the valve, let it drain, and close the valve.
Fresh Water Tank: Do the same as the black and gray tank.
At this point, you need to flush the tanks with fresh water using a hose. If you’re not sure when to stop, keep going until the water stops coming out dirty.
The final step is to fill each tank with about a quarter gallon of water, which will prevent any cracking or shrinking in the cold months to come.
This step is optional, but I highly recommend that you also add bleach, vinegar, or baking soda to sanitise and keep the tanks smelling fine. Follow the instructions on the package of whichever you use to determine the right amount to add.
Also, follow the tanks that I listed in order because only then will they be fully clean.
Step 5: Drain water heater
The water heater is a bit harder to find, so look for it in these common places:
- Near the burner
- Behind a panel
- Or under a cover
If you still can’t find it, a Google search for your RV model should help, or you could look through your RV manual. (This is provided you are using a tank-based heater and not a tankless model. Alternatively, for simpler RV winterization, propane tankless heaters are some of the best tankless heating solutions for motorhomes as well as the most winter-ready.)
As with the water filter, open one of the hot water faucets to relieve the pressure.
The drain plug or valve will also be easily damaged, so using, a wrench or screwdriver, remove it with care
From here on, you just need to let the water drain out all the way. Afterward, clean out the water heater with a hose until the water that comes out is no longer dirty.
Now on to descaling, use something like vinegar or CLR to both clean and descale.
And voila! You’ve settled the water heater.
Step 6: Drain water lines
So we’ve settled the water tanks, filters, and tanks, and we’re now moving on to the water lines.
We’ll start by locating the drains or faucets that are at the lowest points of your RV. These tend to be found under the sink, behind the toilet, or near the water pump. They should also be labelled “Low Point Drain”.
Unlike the previous steps, you now need to open all the faucets in your RV to drain every bit of water. This way, it’ll be impossible for freezing to occur.
We’re almost there, but you also need to open the low point drains or faucets and drain all the water.
Here’s a secret pro tip that seasoned RV owners like me use. For water lines that are harder to drain, you can use compressed air to get the water out. All you need to do is connect an air compressor to the city water inlet and set it to 30 psi (or thereabouts). After turning the compressor on, open the faucets one by one until you hear the sound of air hissing out. This means the line is clear. Don’t close the faucets yet though, because the next step is to open them all.
Step 7: Open all faucets and remove all drain plugs
As we just mentioned, you’ll now need to open all your faucets. On top of that, remove all the drain plugs too. And you’ll want to store these drain plugs in an airtight bag and put it in a dry place.
That’s it for this step!
Step 8: Close all faucets and cap all drains once water has drained
Once you’re sure that there’s no more residual water, close all your faucets and cap the drains using the caps or plugs from the initial equipment list. Make sure they’re tight and secure.
Step 9: Bypass the hot water heater
This step is crucial as it allows antifreeze to go into the water lines without ever entering the water heater tank.
You should have a bypass valve or kit either behind a panel, under some cover, or near the burner.
Turn the bypass valve to the bypass position, or set up the bypass kit using the manual.
Step 10: Install water pump converter kit and turn on water pump
The tenth step is to install a water pump converter kit.
You should already know where the pump is, so go ahead and set up the converter kit there.
After setup, turn on the pump.
Step 11: Connect the system to antifreeze and turn on the faucets
Attach a hose to the water pump converter kit, and put the other end of the hose into your jug of RV antifreeze. As your hose will be sucking the antifreeze up, it has to be fully submerged in the antifreeze so that no air gets sucked in.
Then, turn on the faucets one by one, starting with the farthest one away from the water pump, and working your way towards it.
Turn each faucet off once you see antifreeze coming out. Also, make sure you do this for both the hot and cold faucets.
Step 12: Flush toilet until you see antifreeze
This step is pretty easy. Just keep flushing the toilet till you see antifreeze coming out, but don’t stop there. Keep flushing until you’ve used around half a gallon of antifreeze.
Step 13: Pour a cup of antifreeze down each sink’s drain and into the toilet
We’re almost finished, just a few more steps to go!
For this step, pour roughly a cup of RV antifreeze into the drain of every sink, as well as your toilet bowl and tank.
Step 14: Turn off water pump and add more antifreeze
It’s always better to have more antifreeze than less, so we’ll add just a bit more.
So first, turn the pump off. Then, once again, pump antifreeze by using a hose from your antifreeze container to the pump. If your RV doesn’t allow you to do so, you will need to pour the RV antifreeze straight into the freshwater tank with the aid of a funnel.
Congratulations, at this point we’re done with adding the antifreeze! Keep whatever antifreeze you have left in any spare jugs or containers and store them all in a dry place.
Step 15: Re-check water heater
This is a somewhat optional step, but I like to always be extra careful, so let’s double check the water heater.
Carefully remove the drain plug, or open the valve using a wrench or screwdriver, and check that there is no water or antifreeze inside. There shouldn’t be, but it pays to be safe. And if for some reason it’s not empty, just flush it until it’s empty.
Afterward, either close the valve or replace the drain plug, making sure it’s secure and tight.
Step 16: Close all faucets and ensure pipes are prevented from freezing or heating
Your faucets should currently all be closed, but if any of them aren’t, just turn them off.
From here, proceed to insulate your pipes with foam pipe insulation, which you’ll find at most home improvement stores. Then, cut out the length of your pipes and surround your pipes with it.
If your RV will be anywhere below 32 °F, I would also strongly encourage you to use heat tape. Wrap it around the pipes before you put the foam pipe insulation on. From past experience, it is possible to just depend on foam pipe insulation, for a couple degrees below 32 °F, but anything beyond that, and you risk serious damage to the RV plumbing system.
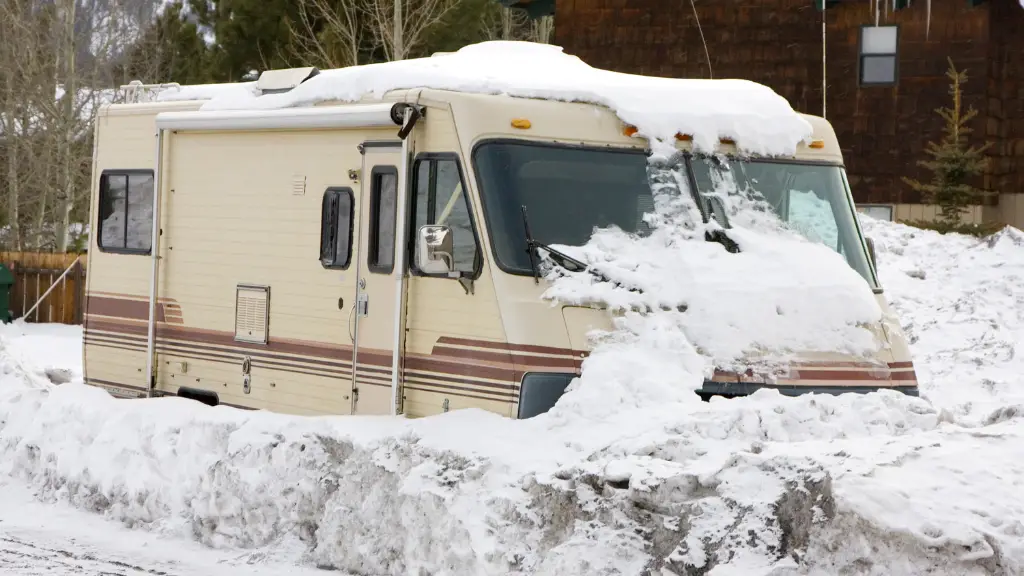
Step 17: Store your RV or travel trailer properly
At this point, all the winterizing is done. Now it’s time to store your RV somewhere safe.
With all the hard work you’ve done, your RV is now very well-protected against the cold. However, it is in no way protected against theft and vandalism. Plus, even with all this protection, you still don’t want to put it through any more abuse than it has to. That’s why you need to store your RV somewhere where it’s safe and at least somewhat sheltered.
Some places that I recommend and personally use each winter are a friend’s farm, RV parks and campgrounds, RV storage yards, and even a garage. Just don’t forget about the insurance and to seek permission.
Here are some other tips I’ve learnt over the years:
- Park on a level surface so that no one side of your RV is under too much stress. And since you’ll be parked there for a long while, make sure your tires are on top of wood or plastic. Try to avoid materials like concrete and asphalt as these materials can crack or go soft, potentially damaging your RV’s wheels. And don’t forget to use wheel chocks to prevent accidental movement.
- Your RV should be safely stored in a dry place from step 1, but remember to charge it every four to six weeks so that it doesn’t discharge fully.
- Cover any openings and vents. You don’t want any insects or rodents getting inside your RV, so make sure to seal off these potential entry points using tape or fine mesh screens.
- Never leave your RV outdoors without a cover. RV covers ensure that mold and fungus don’t form by preventing moisture buildup. They also protect your RV from UV rays. Even if your RV is in an enclosed area like a garage though, you can still use an RV cover so that dust and dirt don’t accumulate.
Step 18: Consult your owner’s manual for information regarding your ice maker and/or washing machine
This step may not be applicable to everyone. But if you’ve got an ice maker or washing machine, you’ll need to follow the manufacturer’s manual or guide to winterize the appliance.
Deciding Whether to Leave Faucets Open or Closed When Winterizing
Open faucets allow for air circulation which ensures there won’t be any pressure buildup in your pipes. It also uses less antifreeze because you don’t need to fill the faucets with antifreeze. The thing is, with open faucets, dust, dirt, and insects can get into your pipes, not to mention antifreeze can leak out.
Closing faucets is what I usually do because even though you will need more antifreeze, if you’ve done everything right, there really aren’t any other cons. Admittedly, there is a chance of pressure buildup which could damage your systems, but that’s only if you didn’t clear out the water properly and there’s water still left inside. Assuming you did a proper check, closing your faucets ensures your pipes stay clean and sanitary. There’s also no chance of leaking from the faucets.
In my opinion, closing the faucets is worth the extra antifreeze because I value the peace of mind that it brings. For those on a really tight budget though, open faucets might be worth considering.
Further Considerations and Tips for First-Timers
If you’re the paranoid type that’s always wondering whether there’s more to something, or if you’re missing anything out, here are a few more things to take note of.
Before you embark on the process of winterization, check for any leaking. Some signs of leaking include mold, rust on pipes, dripping, and so on. And naturally, if you find them, fix them using tape or sealant.
After winterization, you can also test the system by turning on your water pump. Then, open each faucet to see if any water comes out. There should only be antifreeze.
Another thing that I’ve learned the hard way is that you should really snap photos and videos of your winterization. This way, you can quickly refer back to them the next year in case of any uncertainties, or even just use it as a guide. You can also make notes on the pictures or videos.
Winterize Your RV or Camper With Confidence
The first time is the scariest, because it’s such a long process. But trust me, spring comes, you learn how to dewinterize your RV (i.e., reverse the process). Another year swings by, you hit winterization time again, and the second time is a piece of cake!
So even if the task seems daunting, don’t procrastinate because of your fear. Gather your materials, and start on the first step. The rest will follow naturally.
As a final word of advice, most RVers are really friendly. If you still find yourself facing a lot of doubt or uncertainty, don’t hesitate to ask for help from others at the campground!
Stay safe, friends!
It a lot easier to winterize
My travel trailer just by draining H20 from all the H20 lines then blow air at 30 psi to clear any left H20? In clouding hot H20 tank.
Then pour 8-10 oz of antifreeze in each peetrap drain.