RVers, it’s maintenance season. It’s time to paint yo’ wagon! Today, I’ve cooked you up a doozy of a guide teaching you exactly how to paint an RV exterior.
(And with as little headache as possible!)
Now, there are a host of tools you’ll need for the job. And paint – we’ll break down how to choose your paint too. Really, from start to finish, the whole process is detailed right here!
I’ve suffered through a few dodgy paint jobs and some subsequentially much-improved ones too. I’m here to stop you from going through that same migraine. RVProperly’s road-warriors and their trusty steeds only get the best.
Let there be no more pontificating. Only picture-perfect paint jobs. Painting a bedroom is hard enough and this is a whole damn RV…
So this is how to paint an RV exterior as smoothly as Sensei. Paint on!
DIY RV Exterior Paint vs. Hiring Professional Painters
Ok, first, let’s answer the very valid question at hand. Should I really bother painting my RV myself?
Valid. Super valid! Both the DIY job and the professional route have their pros and cons. And you might not even want to consider those… Just pay the guy and be done!
That right there is the big pro of painting professionals. It’s a big heaping headache off your plate and a (hopefully) flawless, long-lasting finish too. Professional painters are well equipped for complex designs and RV exteriors with industrial-grade equipment and, potentially, better paint as well.
However… dayuuum! That bizz-shizz is EXPENSIVE. It’s even worse if you get a couple of brush jockeys who don’t do a good job…
However, what about the pros of DIYing it? Well, it’s certainly cheaper than the professionals! About 50-70% cheaper actually, according to various sources and outlets around the RV community.
Plus, all my control freaks holla! DIY painting is cost-effective WHILE giving you control over every step of the process. The end result is an immense sense of satisfaction as you cruise down coastal highways in a rig you’ve personally refreshed. The blemishes are just part of the journey. 😉
So if you have a spare $5000-$15,000 lying around for professional painters, I’d say go for it! Otherwise, it might just be high time to get your hands dirty and covered in wayward paint droplets.
Choosing RV Exterior Paint
Ok, first, before choosing a paint, consider this-
RVs face ALL the elements. Sun, rain, wind, road debris, snow, probably lava if you’re really unlucky… You need a paint that’s equipped for all of that. Moreover, the better the paint is, the less often you actually have to paint!
When choosing exterior RV paint, the keynotes are durability and flexibility. For DIY projects on a budget, exterior house paint such as acrylic-latex paint is a great choice. It’s weather-resistant and flexible enough to withstand your RV’s constant expansion and contraction as temperatures change. (All the while staying within more standard budgets.)
However, automotive-grade paints, such as urethane-based or polyurethane paints, are absolutely the gold standard. This will give you a finish much more competitive with those peskily priced professionals. These automotive paints are also an especially good choice for metal RVs.
No matter the paint, look for UV-resistant. This prevents fading and sun damage. Trusted brands like Dicor or Rust-Oleum are commonly used in the RVing community for tough coatings and touch-up work. But if you need harder stuff for a full exterior paint job, I’d recommend brands like PPG, Sherwin-Williams, and Behr paint for their high-level application.
Oh, and if your RV has a fiberglass exterior, be sure to apply an epoxy-based primer before painting. This ensures proper adhesion for the paint. And lastly, as the “No sugar, please, Sherlock” of the day…
ALWAYS check that the paint is rated for outdoor use and is compatible with your RV’s exterior surface material. You would hope this didn’t need to be said, but you’d be surprised…
Tools for Painting your RV Exterior
Right, moving along, there are other obvious things you need! (And some less obvious, more forgotten items too.)
To ensure you have ZERO mid-maintenance dashes to the hardware store, I have listed below all the essential gear you’ll need to paint your RV.
Forget the hardware store! Get your gear right here.
1. RV cleaner
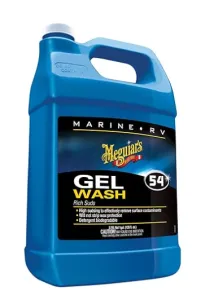
Speaking of essentials, let’s talk about proper surface preparation. This all starts with a good ol’ fashioned deep clean!
Dust, grime, and old wax will ruin even the best paint job if left unhandled. That’s why you NEED a top-tier cleaner on hand. This ensures the surface is spotless and allows the paint to adhere properly for a smoother, longer-lasting finish.
For this, Meguiar’s Marine/RV Gel Wash is a hard yes in all its one-gallon glory. This mix is specifically formulated for fiberglass and gel coat surfaces. It’s able to deliver a powerful clean without stripping an RV’s tender surface of its natural shine.
As a thick gel formula, it clings to surfaces and strips debris while leaving behind a brilliant gloss. It’s high-sudsing action. It’s barely $0.30 cents an ounce. What more do you need!
Try Meguiar’s. Don’t the suds slip you buy.
RV sealant

Alongside cleaning duties, we have sealing duties. Sealing your RV’s joints and cracks is a MUST before painting. This avoids future leaks and damage. Without a quality sealant, moisture creeps in, and your fresh paint job deteriorates much more quickly.
For this task, Dicor Lap Sealant is top-tier. They’re not just a bang-on paint brand. Dicor does many things!
Dicor’s Lap Sealant is specially designed for RV roofs and is able to create watertight bonds around vents, skylights, and other potential leak spots. Plus, Dicor is flexible and responsive to your RV’s movements and weather changes.
Oh, and as a last bonus, this is the 4-pack! It’s another value-loaded deal. You might not need that much sealant right away, but save it for later. RVs aren’t exactly known to be low maintenance, and you might find yourself sealing cracks again before long
Either way, much like paint, Dicor produces top-notch sealant. No complaints! Into the next nitty gritty.
320 grit sandpaper

Cross-section pun – boom! Get gritted.
Multiple grits, in fact. I’ve linked you to a 320-grit sandpaper, however, that brand comes in many ratings. For a pre-paint sanding of an RV exterior, I’d recommend:
- 80 to 120 for the initial surface preparation (if you’re stripping old paint or smoothing rough areas).
- 220 to 320 for smoothing and leveling (after the initial sanding or for areas that just need scuffing).
- 400 to 600 for the final pre-paint sanding (after priming and before applying the final paint).
Getting to this finer grit stage allows you to smooth the primer coat and create a clean, smooth surface for the paint to adhere to. For this reason, sanding your RV’s exterior before painting is a non-negotiable step. (Unless you want your paint job to look like melting Rick Krispies, of course.)
MAXMAN Automotive Sandpaper is ideal for prepping your RV. This brand of sandpaper is automotive-grade. As such, it’s versatile for multiple surfaces, such as metal, fiberglass, and even primer. And it’s also anti-clogging which means it will last longer during extended sanding sessions on bigger vehicles (like an RV!).
Again, I still suggest buying a few sandpaper ratings of increasing finesse – not just the 320. Sanding is like leg day: not to be skipped! It makes a big difference.
And MAXMAN’s Automotive Sandpaper is the tool for the job!
Edging paint brushes for latex paint

Whoo boy. Trims and edging. A bane to anyone’s sanity.
When painting your RV, precision is key. There are A LOT of edges, trim, and smaller details. That’s where a good edging paint brush comes in! These little beauties make tight spots easy to handle ensuring crisp, clean lines right around your rig.
This 5-pack of Pro-Grade Edging Paint Brushes is perfect for this task! Designed specifically for the latex paint of most RV DIY jobs, these brushes offer smooth, even coverage and excellent control for fine details.
The angled tips of the brushes make it easy to cut in around windows, vents, and door trims without any tape. Plus, the synthetic bristles hold just the right amount of paint to reduce pesky dripping.
A good workman never blames their tools… Unless their tools are totally wrong for the job at hand (aka spray paint). So don’t use any old paintbrushes! When tackling an RV paint job, having the right brushes makes all the difference
So get professional-grade performance with this Pro-Grade Set!
Paint rollers

Many hands make light work. In lieu of extra hands, try a paint roller!
Paint rollers make painting an RV’s exterior significantly easier. They are primed for quickly painting large, flat surfaces. So things like the RV’s roof, walls, or side panels become lightning-quick paint jobs all with the added bonus of eliminating ugly paint brush streaks.
For the ULTIMATE process improvement, try the Pro-Grade Paint Roller Covers. These microfiber roller covers are designed for smooth, even application across a range of surfaces. From fiberglass to metal, these covers boast a lint-free design, meaning no nasty shedding and excellent compatibility with latex paints.
They’re cheap. They’re efficient. They’re 50-75% faster than dinky hand brushes. Paint rollers aren’t just an upgrade…
They’re a Pro-Grade!
Handles for Paint rollers

But those paint rollers aren’t going to do diddly without handles! Unless you want to hand-roll those covers… But at that point, you may as well be fingerpainting your RV.
Brushes need handles, and rollers are no different. Solve this dilemma and deck out your Pro-Grade Rollers with the Magimate Paint Roller Handle!
Jokes aside, these are fine handles at an even finer price. Its ergonomic, non-slip grip feels good in your palm and is designed for extended use without causing fatigue. But what I’m really a fan of is how Magimate has tackled extendability…
While these aren’t strictly extendable handles, they are universally extendable. They have universal threading in the handle for compatibility with universal extension poles and a lot of broom handles too! This is a great way to cover extension functionality (absolutely crucial for painting an RV) while keeping the cost low.
So that’s the summary! It’s a low-cost solution to your handle-less painting woes. Now all you need is something to hold the paint.
7. Paint tray and liners
Decant for an enchanting paint job! Only Neanderthals are dipping straight into the paint can. A paint tray (and liners to protect the tray) are essential for keeping your RV painting project organized and mess-free. More importantly, they’re particularly perfect for correctly loading paint rollers for smooth application.
Unvert’s Reusable Paint Tray and Liners are a smart choice in this domain. Firstly, the tray is metal which I’m much more partial to over plastic options. This makes it sturdy, reusable, and 20% less prone to erupting chaos when you accidentally step on it.
The tray has a deep well design to maximize the paint you can hold without trips back to the bucket. Plus, with 40 included disposable liners (or fewer if you so desire), you can protect the tray while working and almost entirely eliminate messy clean-ups.
Yes, these are the basics for painting an RV. But these are the things you need. Personally, I’ve done so much post-painting scrubbing in my life that any additions that minimize the process like these liners are an instant win. But speaking of messes…
Let’s talk something for all that spillage!
8. Drop cloth
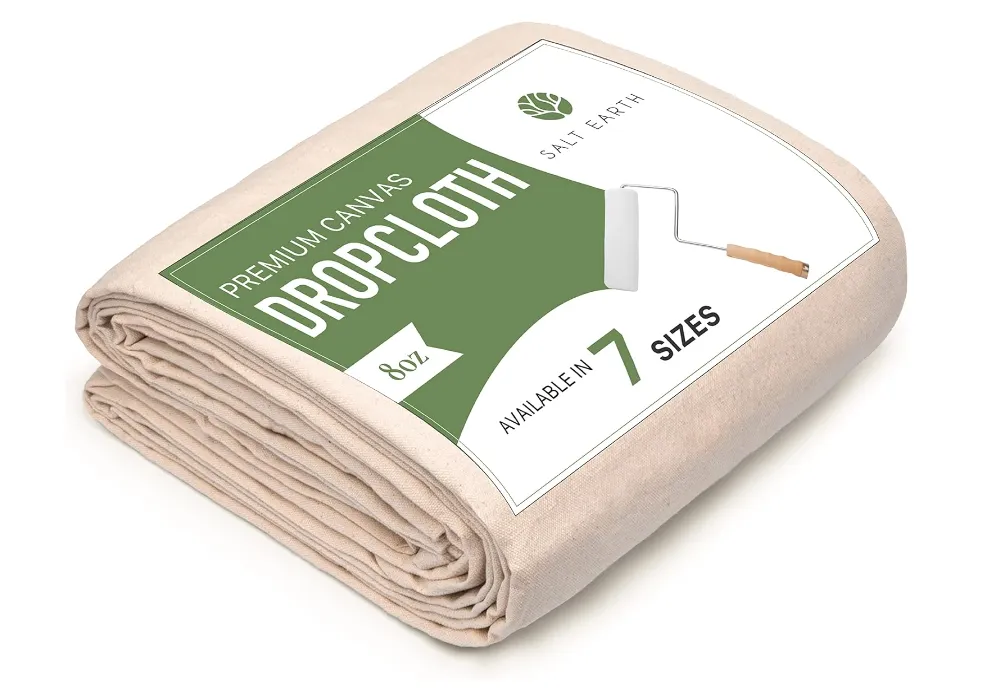
Flecks will fly. Brushes will drip. Feet will land in clumsy places. Protect yo’ workspace from the pitfalls of painting with a drop cloth!
I’ve done a lot of scrubbing and laid down a lot of drop cloths in my life. That’s why I can profess that this reusable drop cloth is leagues ahead of any mediocre single-use plastic solution. Why use a discount festival poncho when you can use something robust and comprehensive?
The Salt Earth Reusable Drop Cloth is a great option made from durable, heavy-duty canvas. This cloth is large enough to cover significant areas around your RV, is highly protective, and is equipped for indoor and outdoor use alike. Top that off with machine wash-friendliness and you have a much more cost-effective and much more eco-friendly choice for painting projects than the standard plastic sheet…
This might seem like a lot of selling for a drop cloth, but I’m honestly just a fan. Environmentally sound products are always a win. And I’ve tussled with enough poncho-sized drop cloths to know a better option when I see one.
Get a better solution: paint in peace.
9. Painters tape

An edging brush simply ain’t going to cut it for cutting in! For a professional-looking job at a DIY-level, you need painter’s tape.
So for that, FrogTape’s Multi-Surface Painter’s Tape is the go-to choice. Purposefully engineered for complex paint jobs, FrogTape is treated with PaintBlock Technology, which forms a micro-barrier along the tape’s edges to stop paint from bleeding underneath.
It’s also a multi-surface tape. FrogTape sticks well to various surfaces, including metal and fiberglass, and peels right off without leaving annoying residue behind. Basically, it’s a cheat code to crisp, precise edges every time, perfect for those detailed areas around your RV’s doors, windows, and vents.
It’s a simple but essential addition to your painting gear. Painter’s tape, and particularly FrogTape, ensures top-level results WITH minimal touch-ups. Throw in a set of edging brushes and you’re in for an easy time!
10. Decal remover wheels

This won’t apply to all RVers. But if you have any old decals to remove before repainting your RV, there are tools for that process too!
In particular, the Decal Remover Wonder Wheel is perfect for this task. It’s a rather minimal but clever solution designed to quickly remove stickers, adhesives, and RV decals without scratching your RV’s surface.
How’s it work? Shockingly simply! The rubber wheel attaches to any standard household power drill, essentially making a rotating rubber buff. The drill rotates, the wheel spins, and the decals come off damage- and residue-free!
Not enough POWER? Pair the Wonder Wheel with a hairdryer or heat gun and you have officially reached final form. By warming up the decal with a heat gun, you reduce the chance of tearing or leaving behind stubborn patches. It’s a pro-grade tip for any DIY newbies.
Simple, effective, and cheap: that’s the kinda solution I dig! If you don’t have decals, you can skip this bit of gear. For everybody else, I strongly recommend investing in a Wonder Wheel and instead skipping a splitting migraine during the project.
11. Level

Nothing sets off unrelenting standards like a finished paint job with uneven lines. Luckily, there’s a tool for that too! A good level helps you keep your project on the straight and narrow.
So try this 3-piece set. The WORKPRO Torpedo Level Set is a versatile package that’s perfect for RV projects. With a 9”, 16”, and 24” level included in the purchase, there’s little reason to stuff up your lines ever again!
The 9” level in this package, in particular, comes with a magnetic base. This allows it to stick to metal surfaces, like many RV exteriors, so you can work hands-free. Other than that, they’re straightforward work tools. No fuss nor muss – just rugged, pragmatic design.
Alternatively, you could just wing it. It’s good to leave the perfectionism at home sometimes, especially out on the road! But if you want to home-job your RV’s exterior with professional-looking trims and lines, you’ll need a good level.
Steps to Painting your RV Exterior
Alrighty! We’ve discussed the what, now let’s talk about how!
Painting your RV exterior might seem intimidating, but with the right steps and strategy, it’s a totally manageable task. Here’s a step-by-step guide to get you started:
- Wash and prep the surface. Before you begin your exterior camper paint job, thoroughly clean your RV with soap and water to remove dirt, grime, and old wax (Meguiar’s comes in handy here). Once dry, sand the surface to create a smooth, even base for the paint to adhere to. The best sandings will start coarse and work their way gradually to finer grits.
- Mask and cover windows and trim. Got that FrogTape? Good! Use the tape to protect any trimmings like vents and windows. Then use a drop cloth to protect the remaining areas and parts of the RV you don’t accidentally want to get splashback.
- Apply primer. If your RV has a fiberglass or metal exterior, apply a suitable primer. This step ensures better adhesion for the paint and a longer-lasting finish.
- Get painting! Grab those Pro-Grade Rollers (and some handles too) ‘cause it’s time to paint yo’ wagon! At a minimum, you’re going to need at least two coats. Paint one, let it dry completely, then do the same for the second top coat (and more, if you’re so inclined).
- Seal with a clear coat. When you’ve done enough coats of paint, finish with one final clear coat to protect them from UV rays and weathering. This keeps your RV looking fresh and pushes the next RV painting project further down the line.
How our Paint is Holding Up on the Road
One year and many miles after painting your RV, it’s time to assess how well it’s holding up. From my experience, the key things to watch for are fading, peeling, and cracking.
Inspect areas exposed to constant sunlight or where road debris tends to fly up and hit your RV’s exterior. Fading is a sign the paint’s UV protection is likely wearing thin. Meanwhile, peeling usually means poor adhesion or potential issues with moisture.
I also like to check for chips or scratches. Definitely check around corners or edges for these. Chips and scratches are early signs that a touch-up might be needed. You can spot-paint any small areas like this to prevent larger issues later on and save yourself the broader headache.
Lastly, if the entire surface seems dull or worn, it might be time to consider a new clear coat or even a full repaint, depending on the condition. If that’s the case after only a year though, it would be worth looking at potential deeper issues as to why your paint job is lasting. However, that likely won’t be the case.
If you stay on top stay on top of small issues every 12 months or so, you won’t get pulled back into the maintenance misery anytime soon. A little ongoing TLC keeps your RV looking sharp for many trips to come.
Conclusion
And you’re done! A little bit of knowledge goes a long way for these larger projects.
I hope, after this scintillating read, you’re feeling good and ready to grab your brushes! If not, it might still be worth considering hiring professionals.
But naaaaa. Don’t do that. RVlife is about freedom. Resourcefulness. An almost pathological tendency to carve your own path (you maverick).
So, no. Don’t drop a five-figure sum on professional painters. DIY it! Become the maintenance master you were always born to be.
The first time you paint an RV’s exterior, there will be mistakes and headaches. But the more you do it, the better you get. The blemishes are just part of the journey, and the destination is the satisfaction of carving your own path in a world that would ask you to pay $10,000+ for a quick paint job.
Save those dollars. Put them into the road trip budget instead. Make memories, not receipts.
Just make sure you get the right gear. Painting is already a mission and a half! So suit up and paint in peace, just like Sensei…
Paint off!